Creating a project
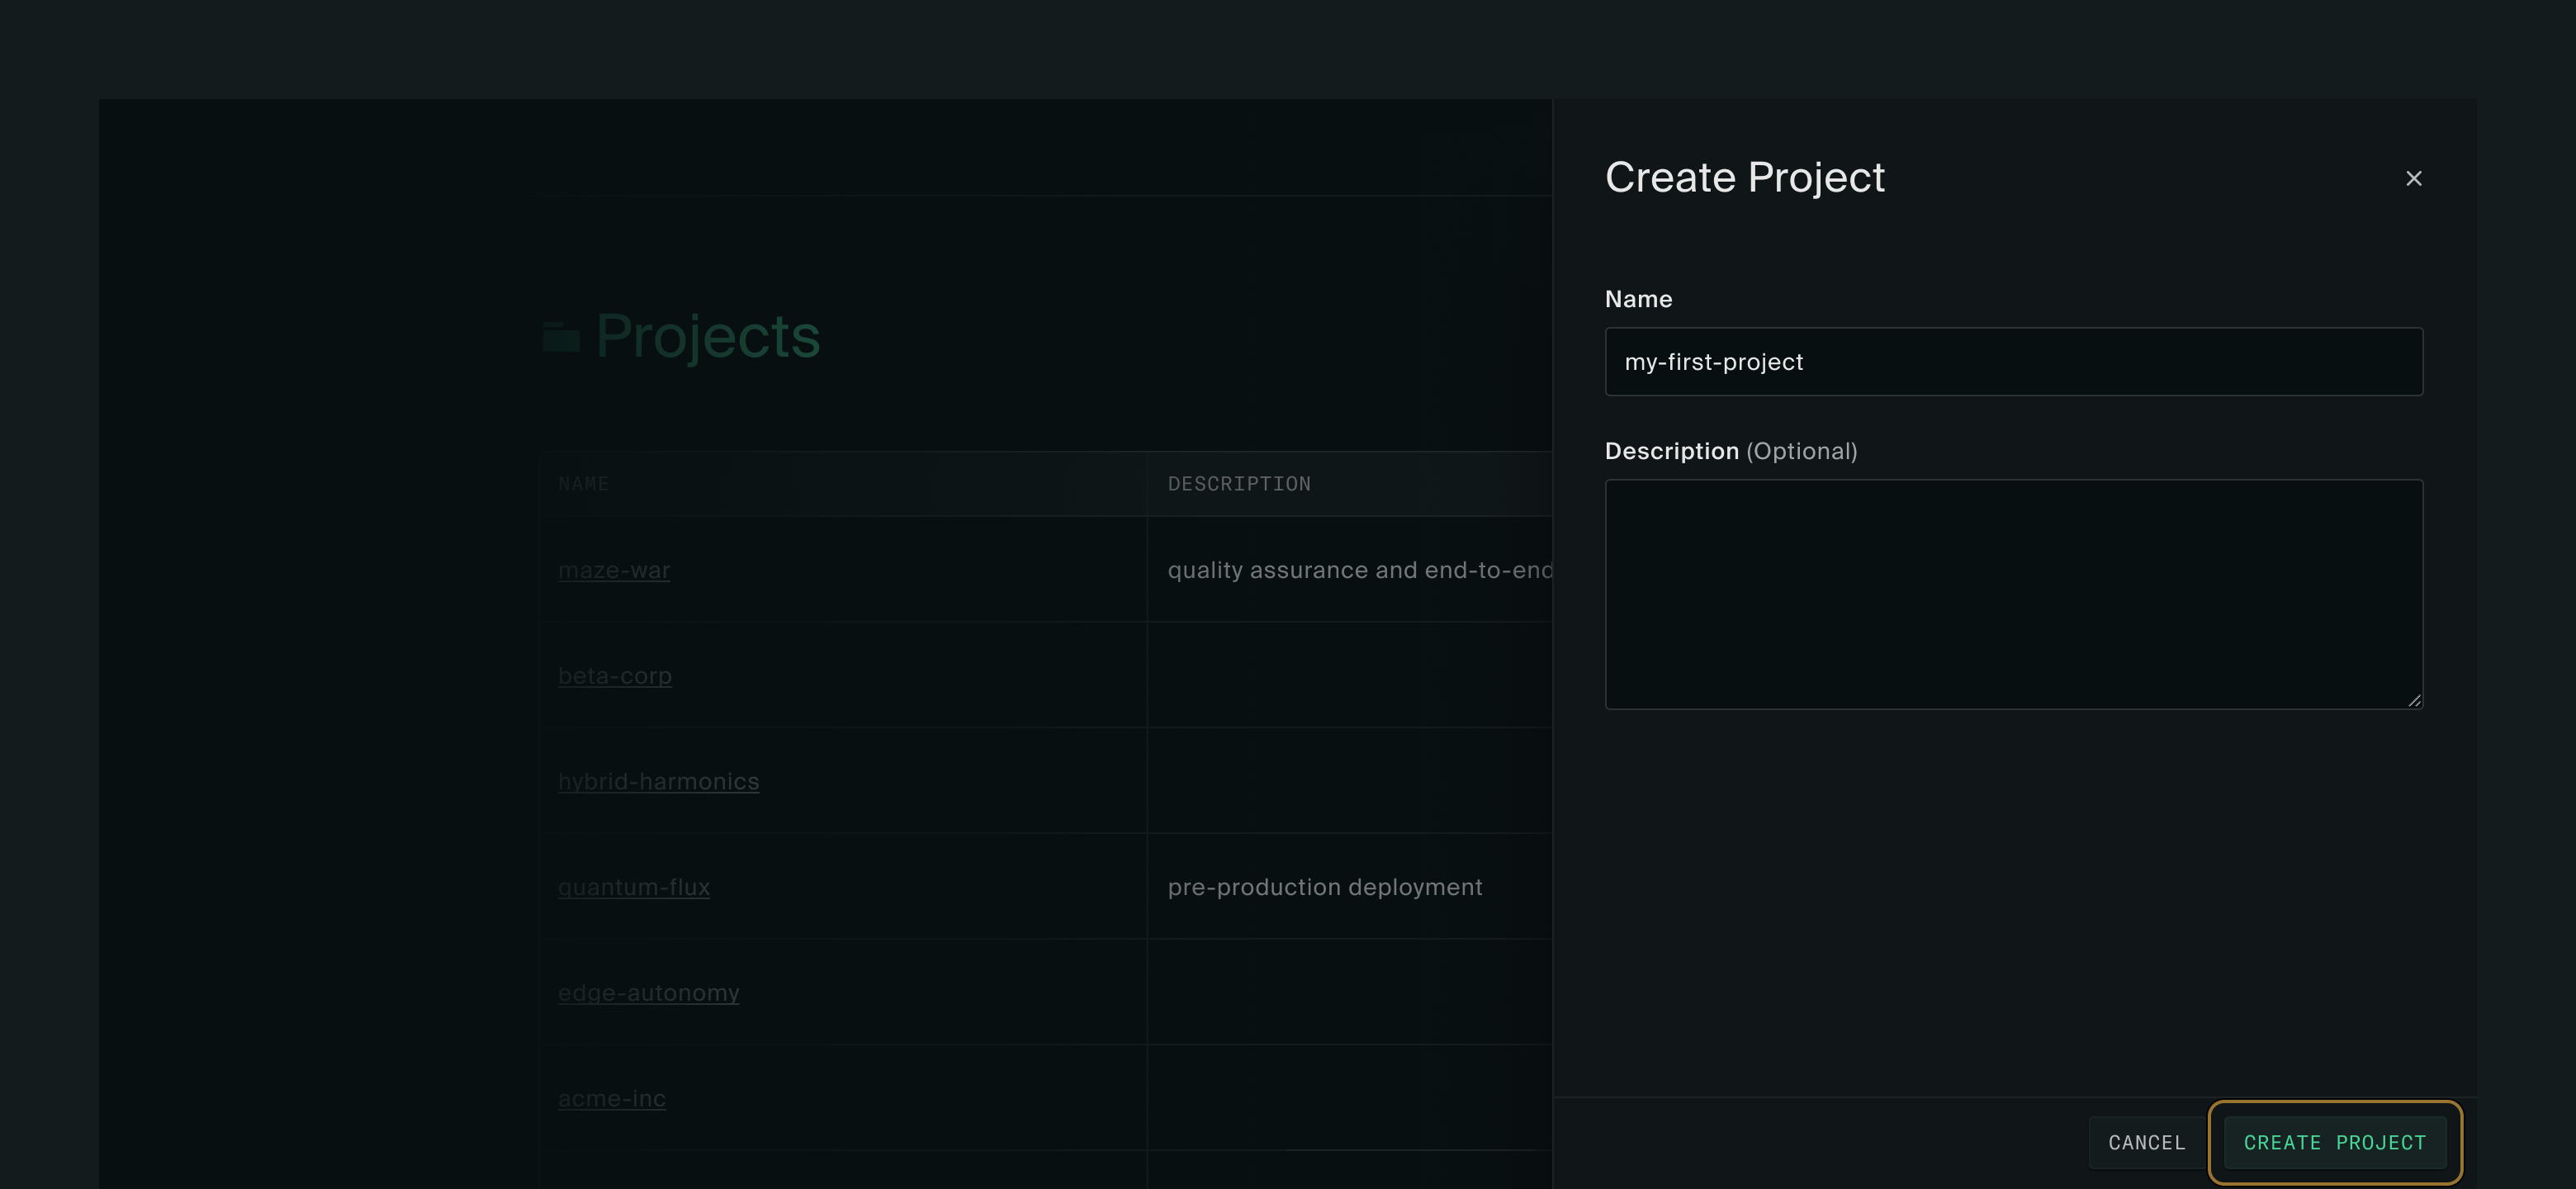
The first thing you’ll see after logging in is the Projects page. A project is a collection of resources like instances, disks, images, VPCs, and floating IPs. Instances must be created within a project. Create one by clicking New project.
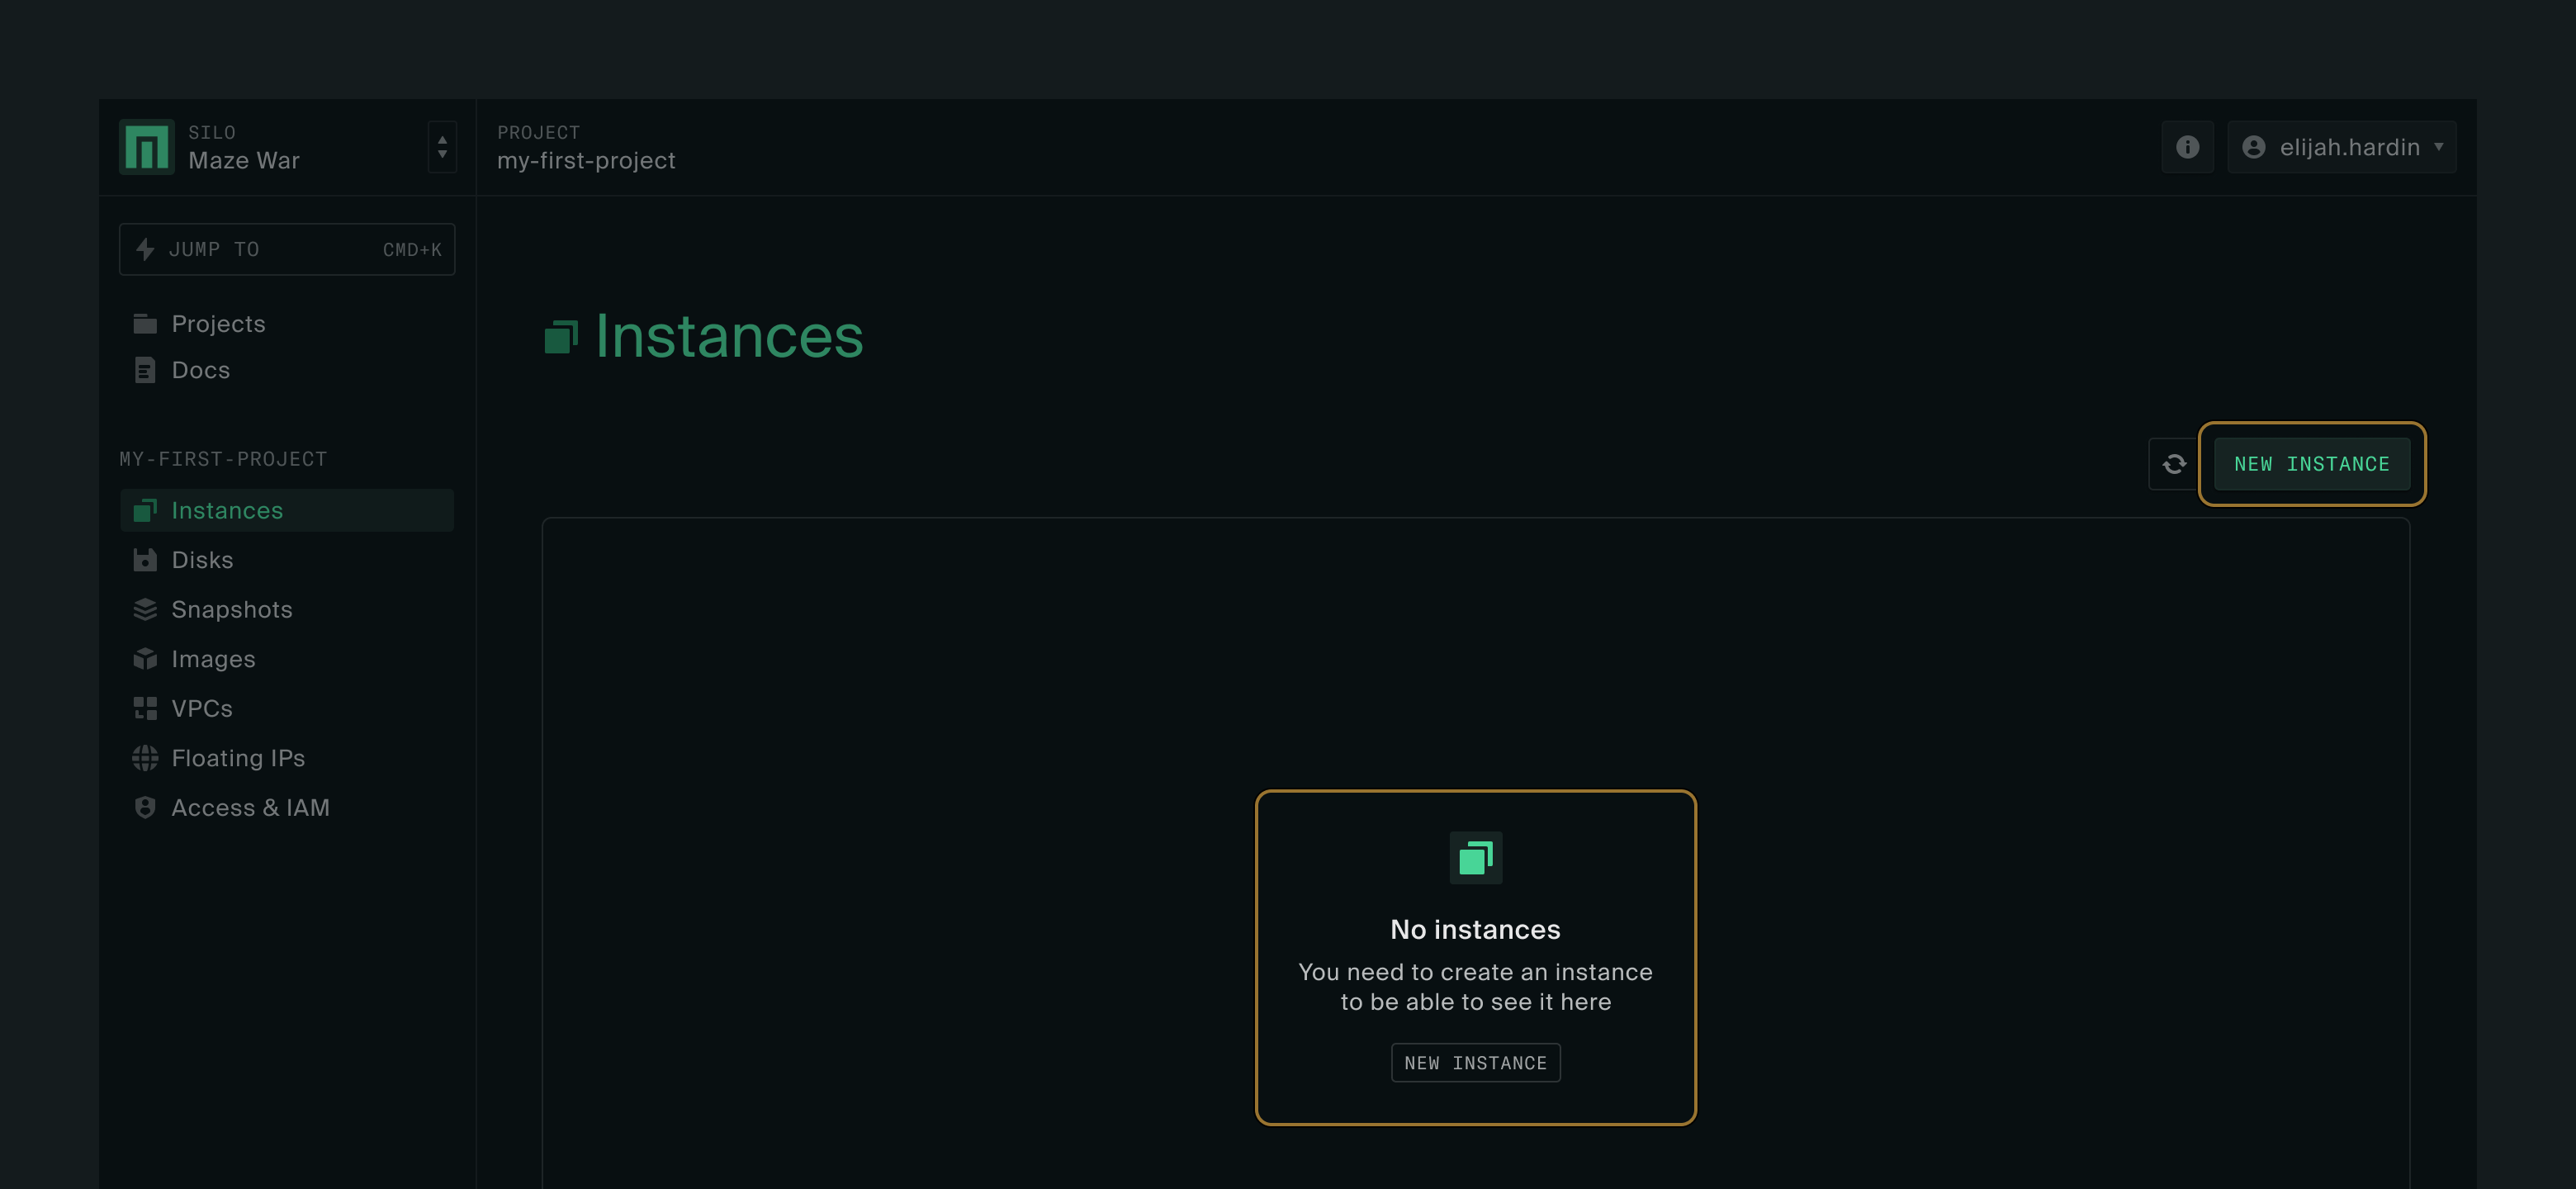
Give your project a name and click Create project in the lower right corner. You’ll be taken into your project and shown the Instances page. There won’t be any instances yet.
Creating an instance
Click New instance to go to the instance create form.
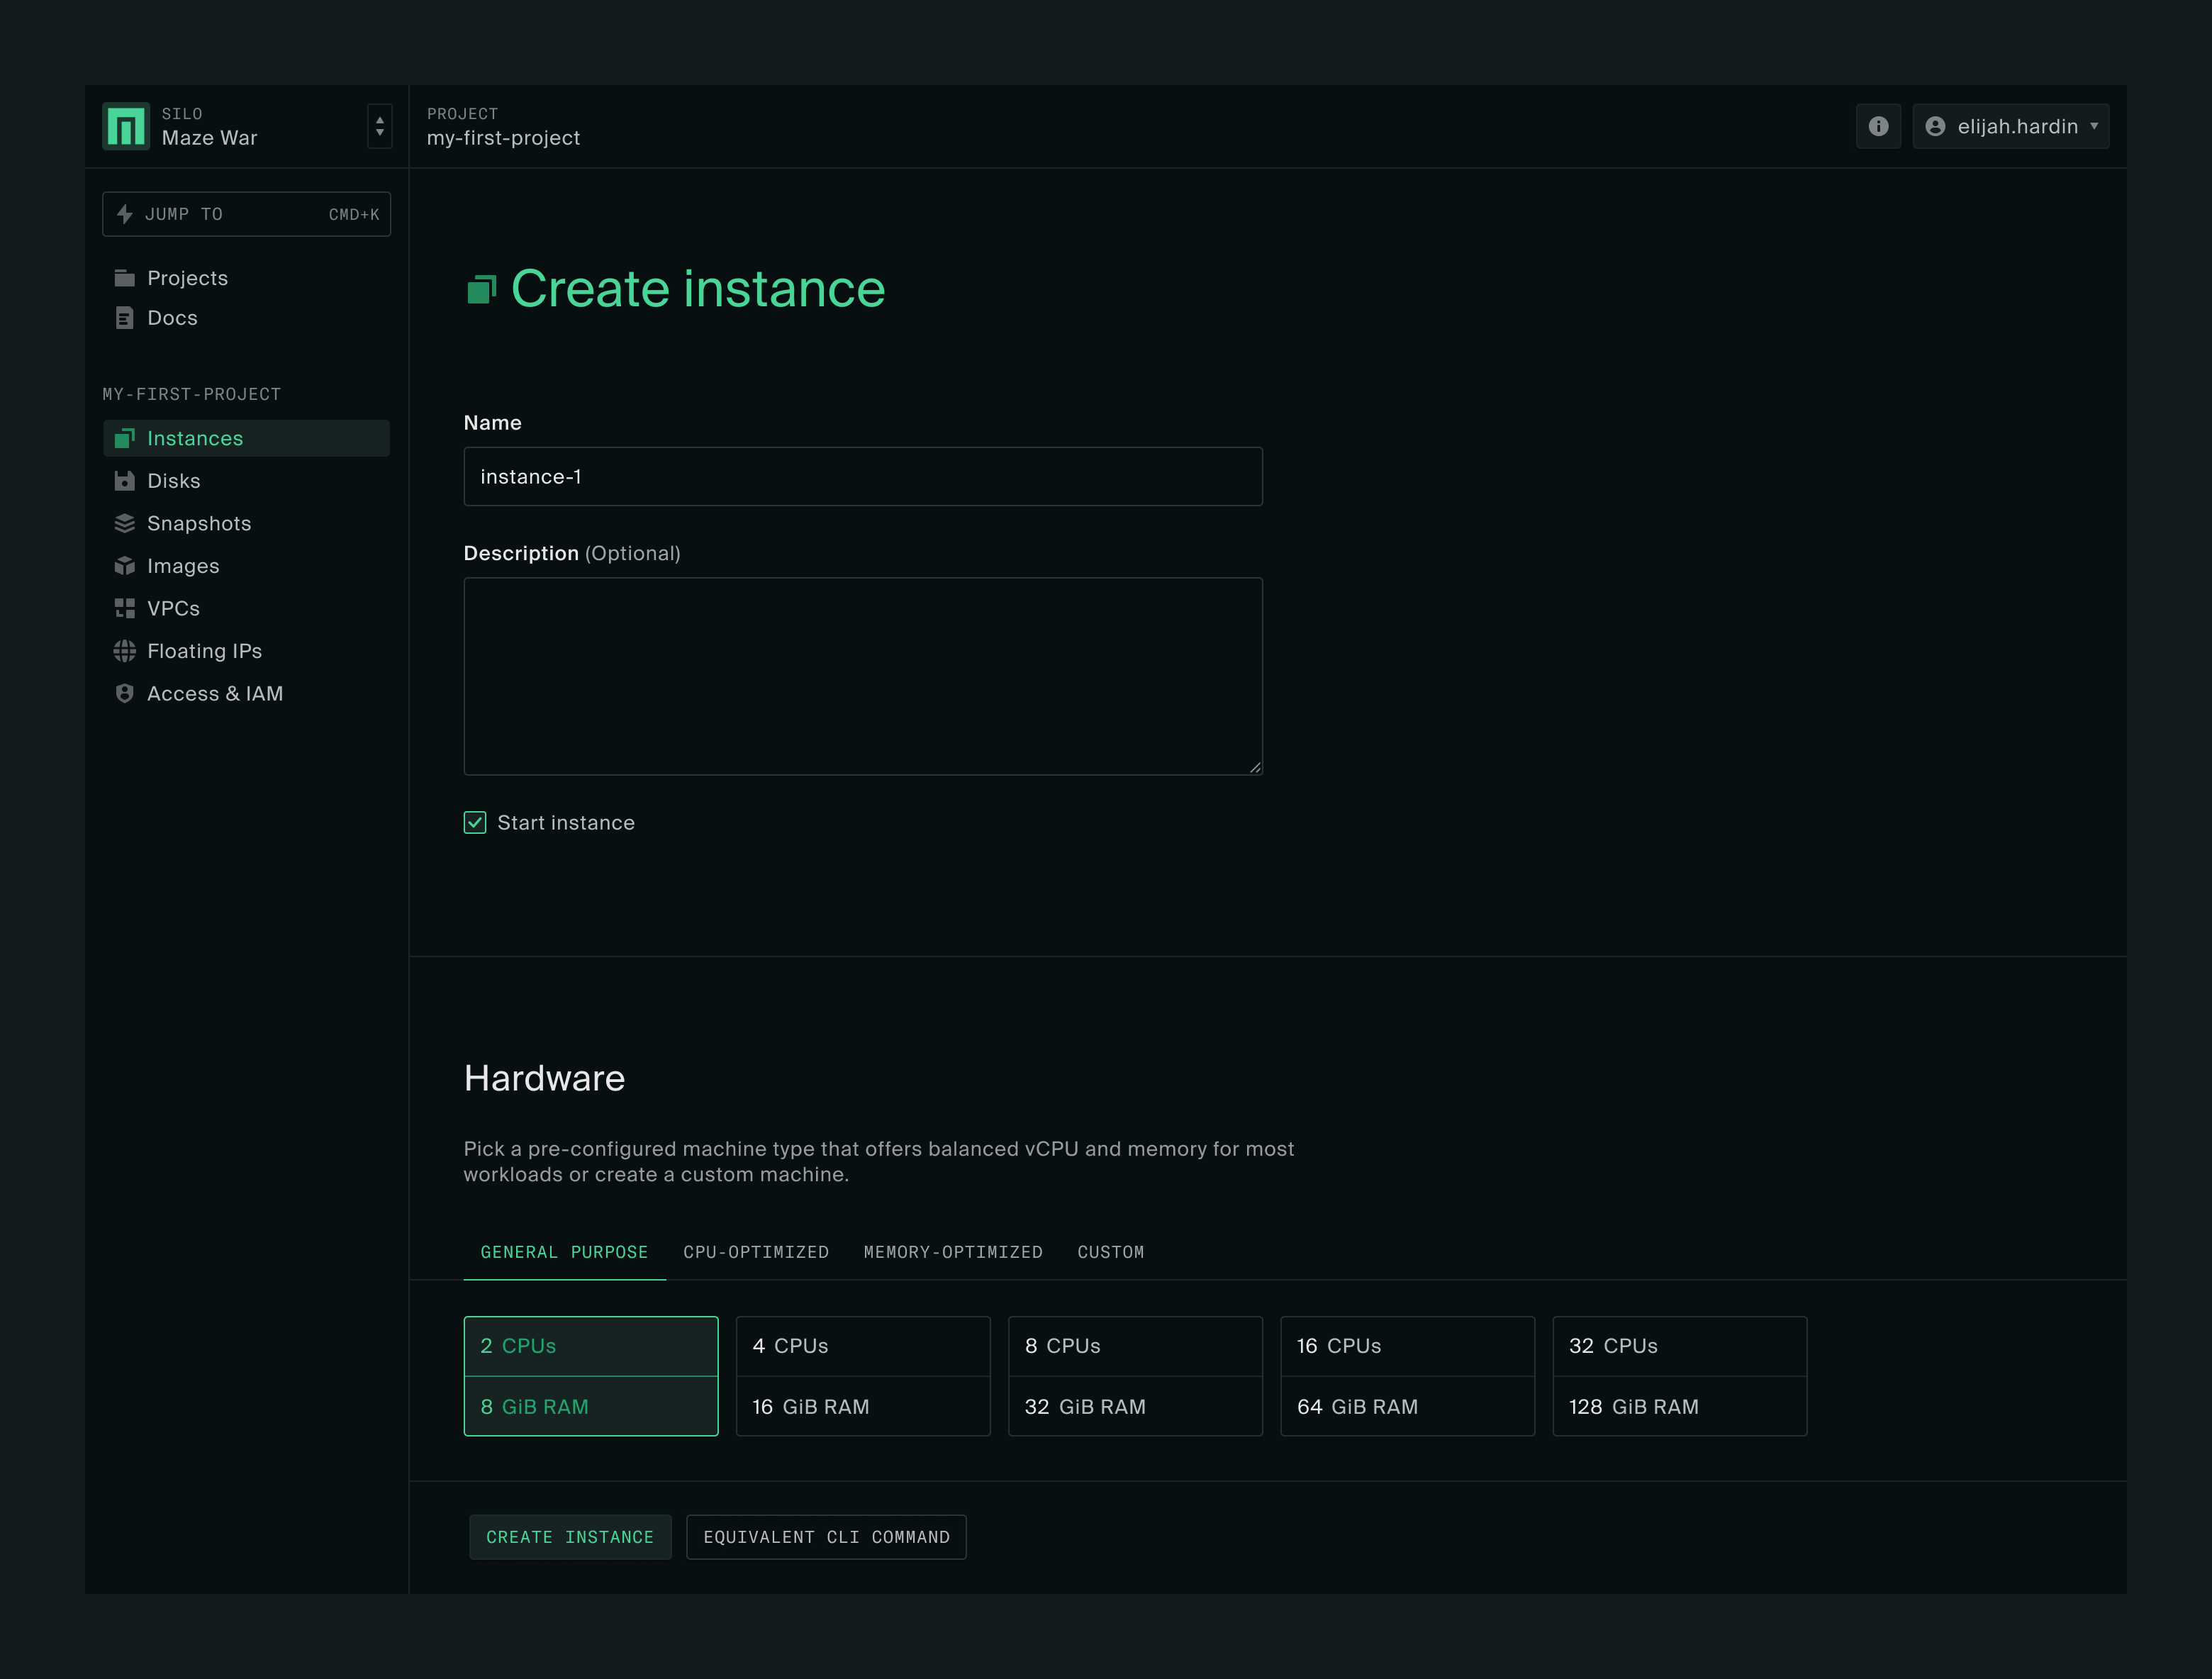
There are a lot of options on this page, but we’re going to keep it simple. Give the instance whatever name you’d like and scroll down.
Hardware
Under Hardware you have the option to set up a pre-configured choice — a high CPU instance, a high memory instance, or a general purpose instance — or to set your own CPU and memory values. Leave it on the default of 2 vCPUs and 8 GiB RAM.
Boot disk
When you get to Boot disk you’ll see two options.
Silo Images: images available for use in all projects in the silo
Project Images: images that you upload for use with your project
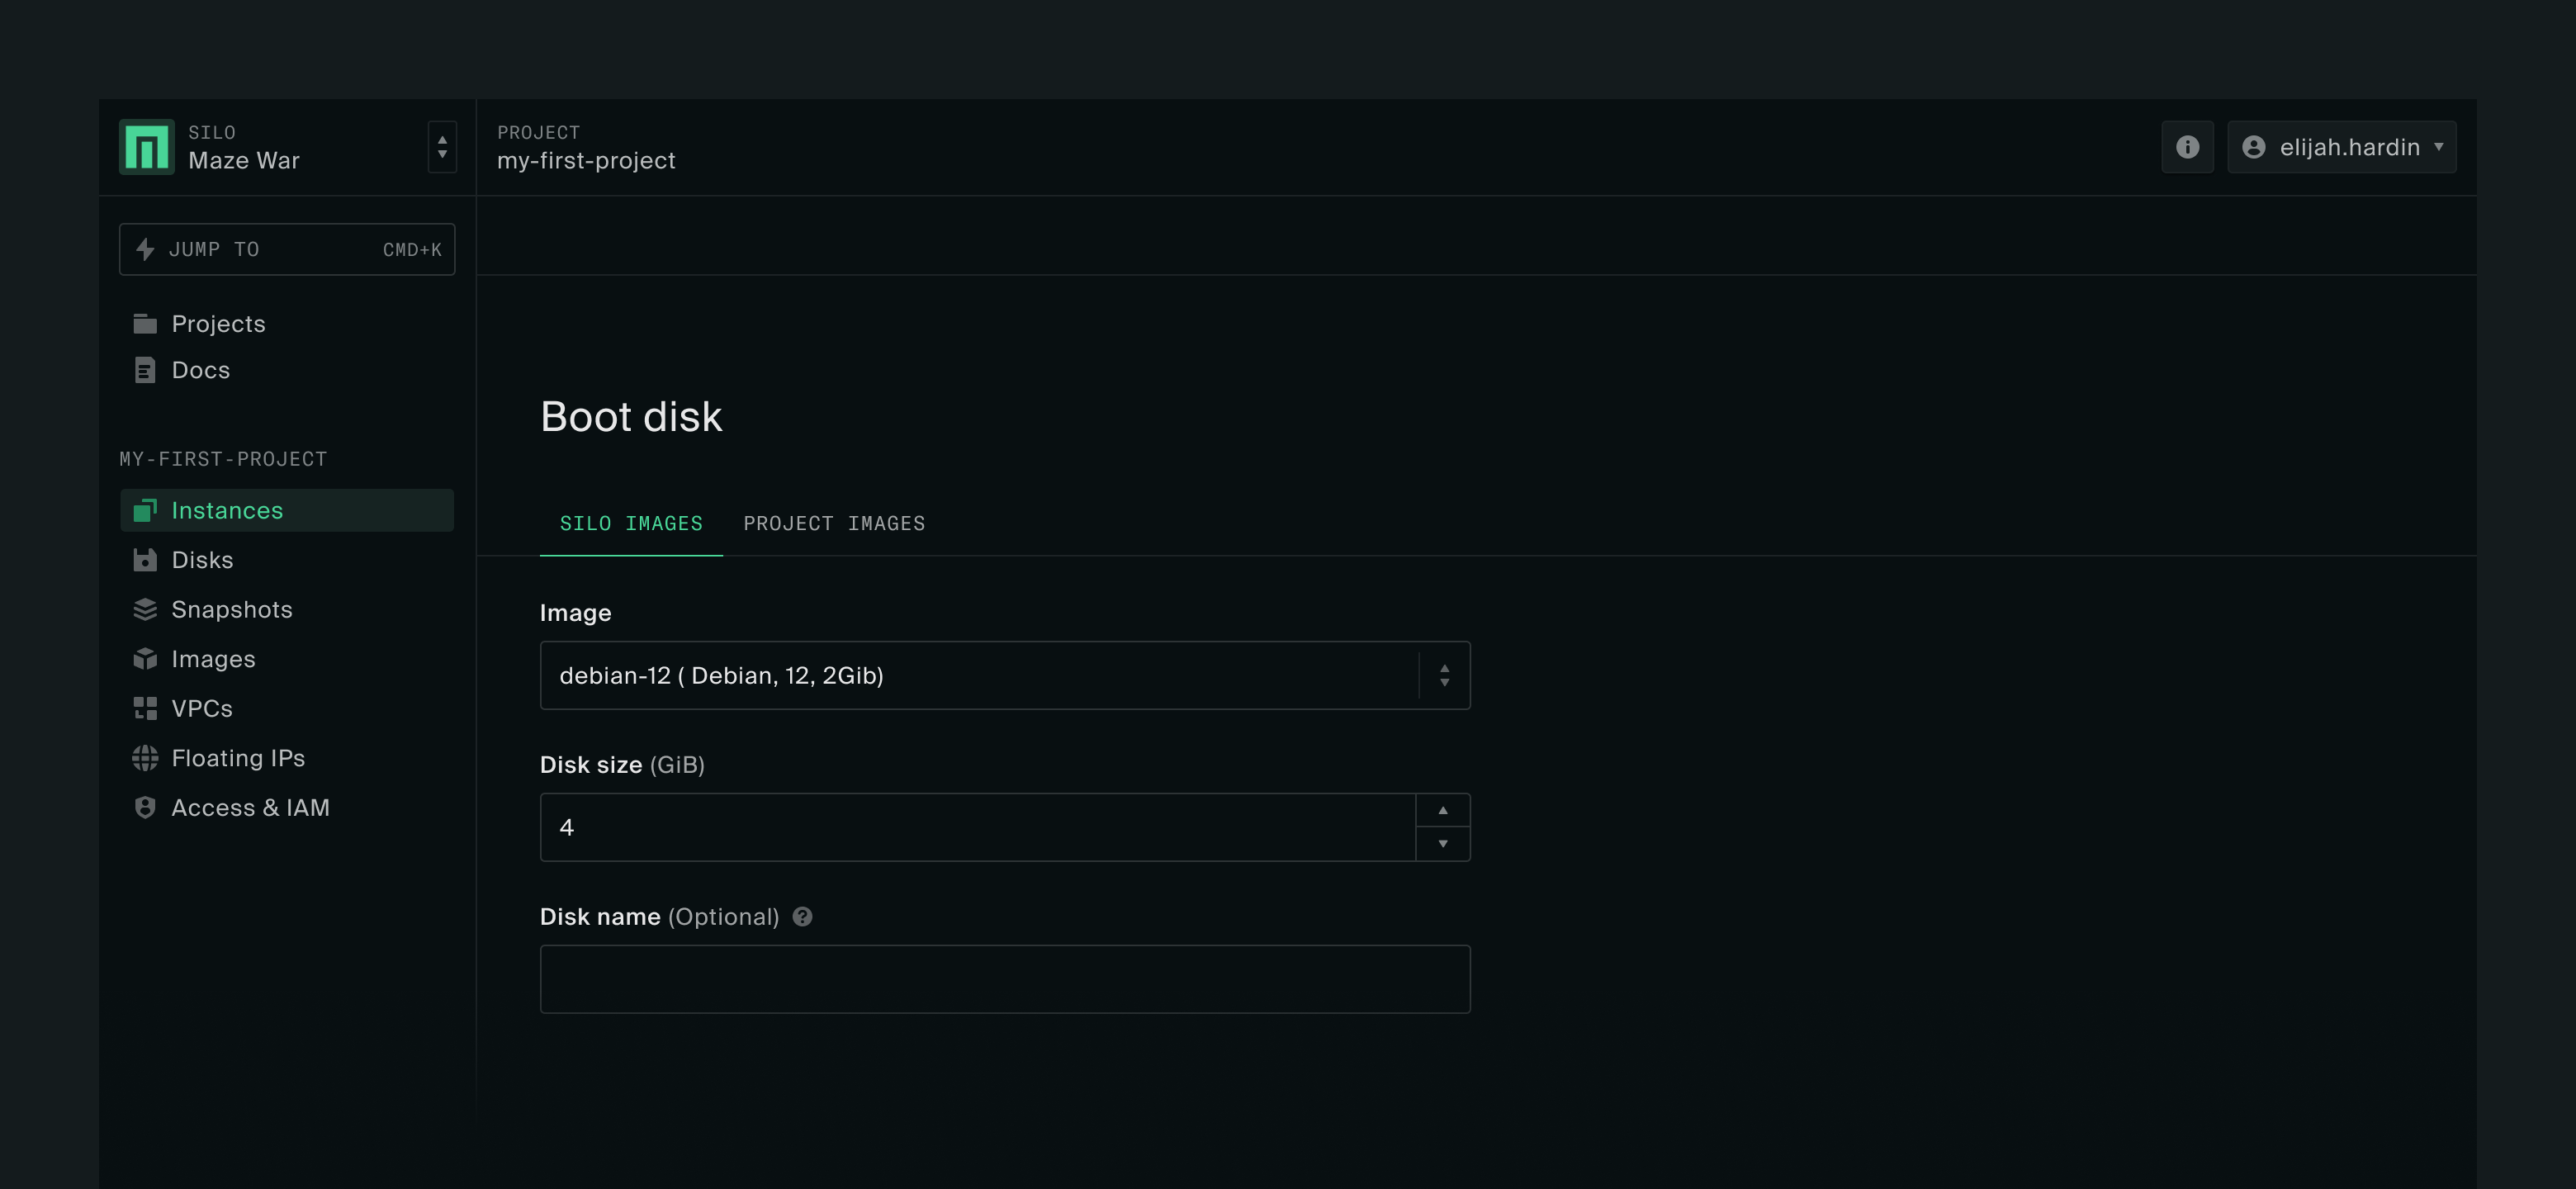
For the instance creation steps below, we’re going to use Debian-12-generic, one of the examples in How to make test images. If you have a different image, the steps are the same.
Authentication
Further down the page, you’ll see the Authentication section, which lists all the SSH keys in your profile.
It’s likely that you don’t have any SSH keys yet. You can add one right here by clicking Add SSH key.
If you don’t have a SSH key pair for use on Oxide yet, you can follow the instructions here to generate a new one.
Once the key has been added, you will be able to select it as an authorized key on the instance for SSH access. You will also have the key in your profile for future use.
Submit
You can leave everything else on the form alone. Click Create instance at the bottom of the page.
Using your instance
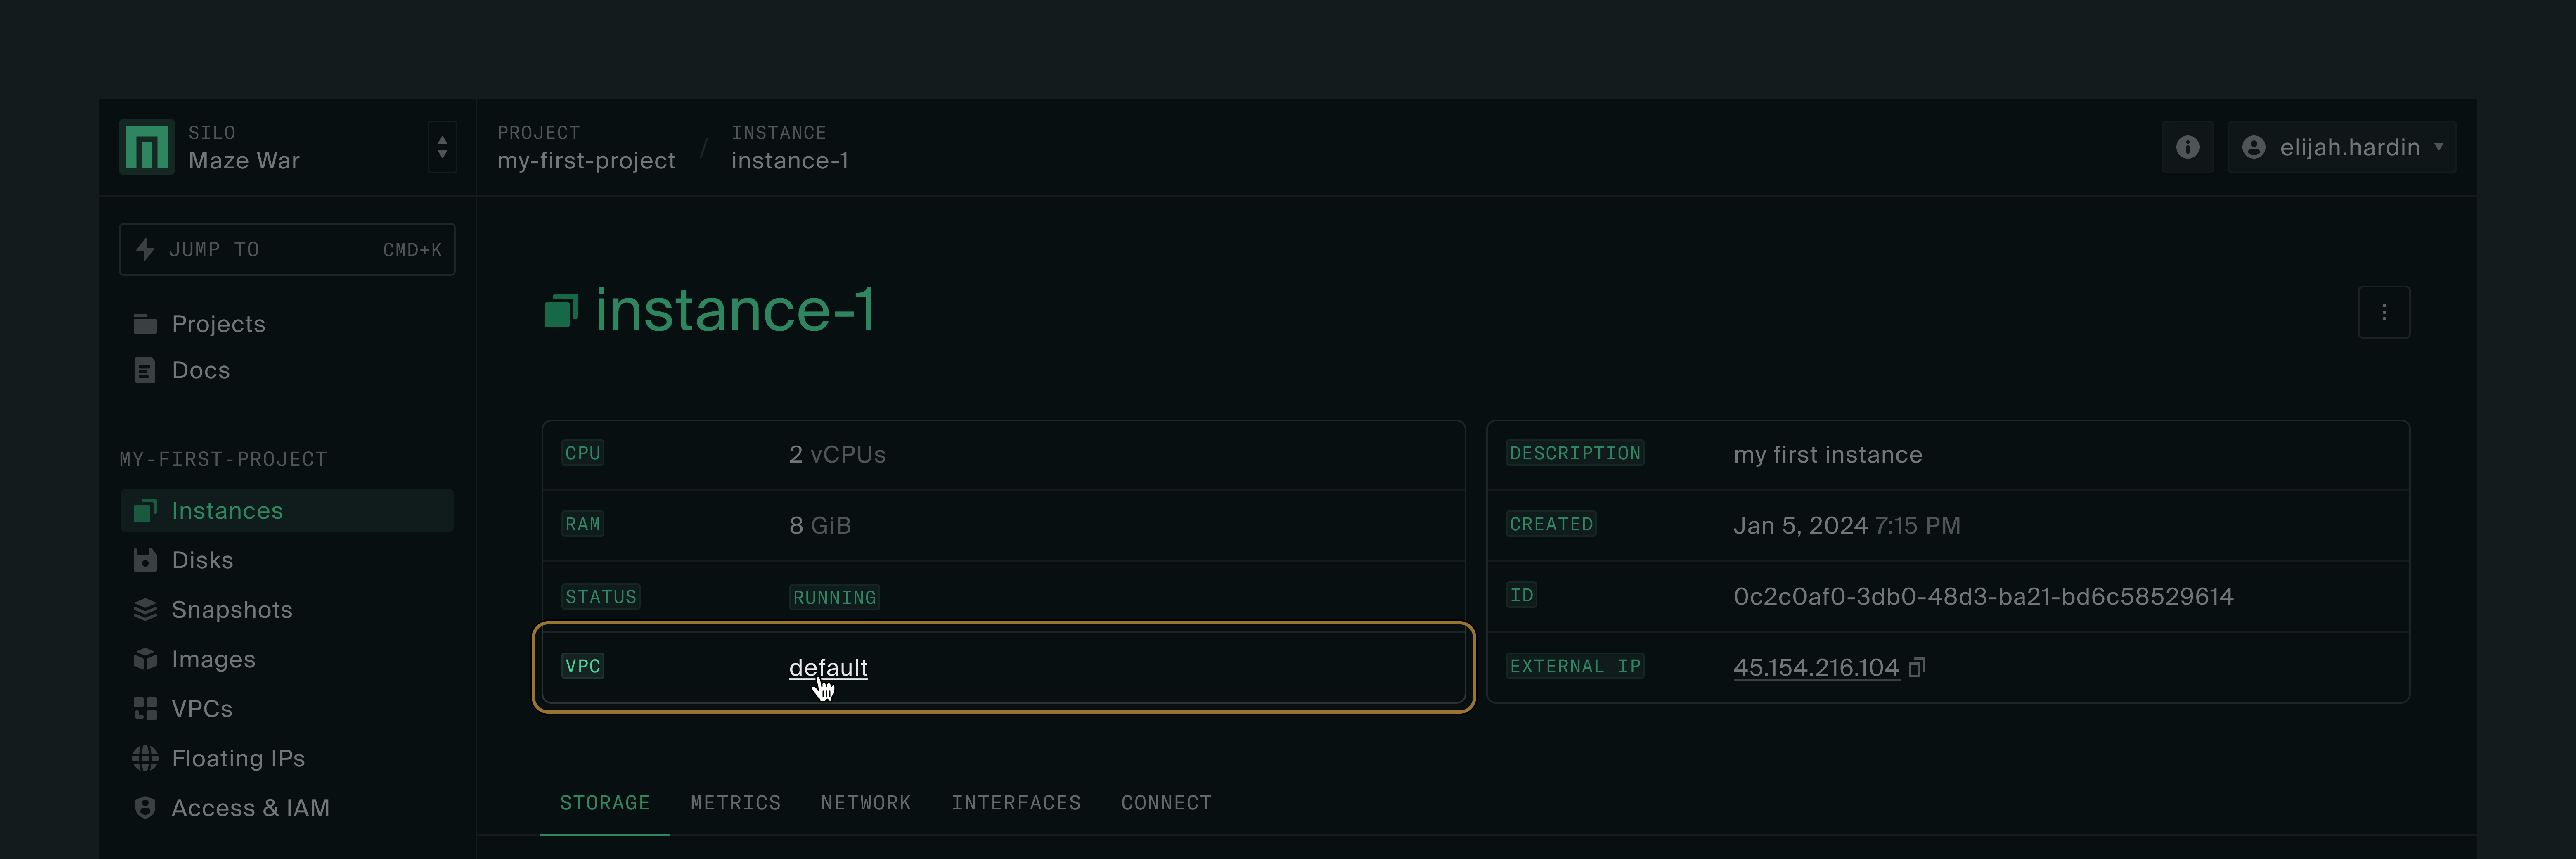
After you create your new instance, you’re taken directly to the instance detail page, where you’ll see a few tabs: storage, metrics, network interfaces, connect.
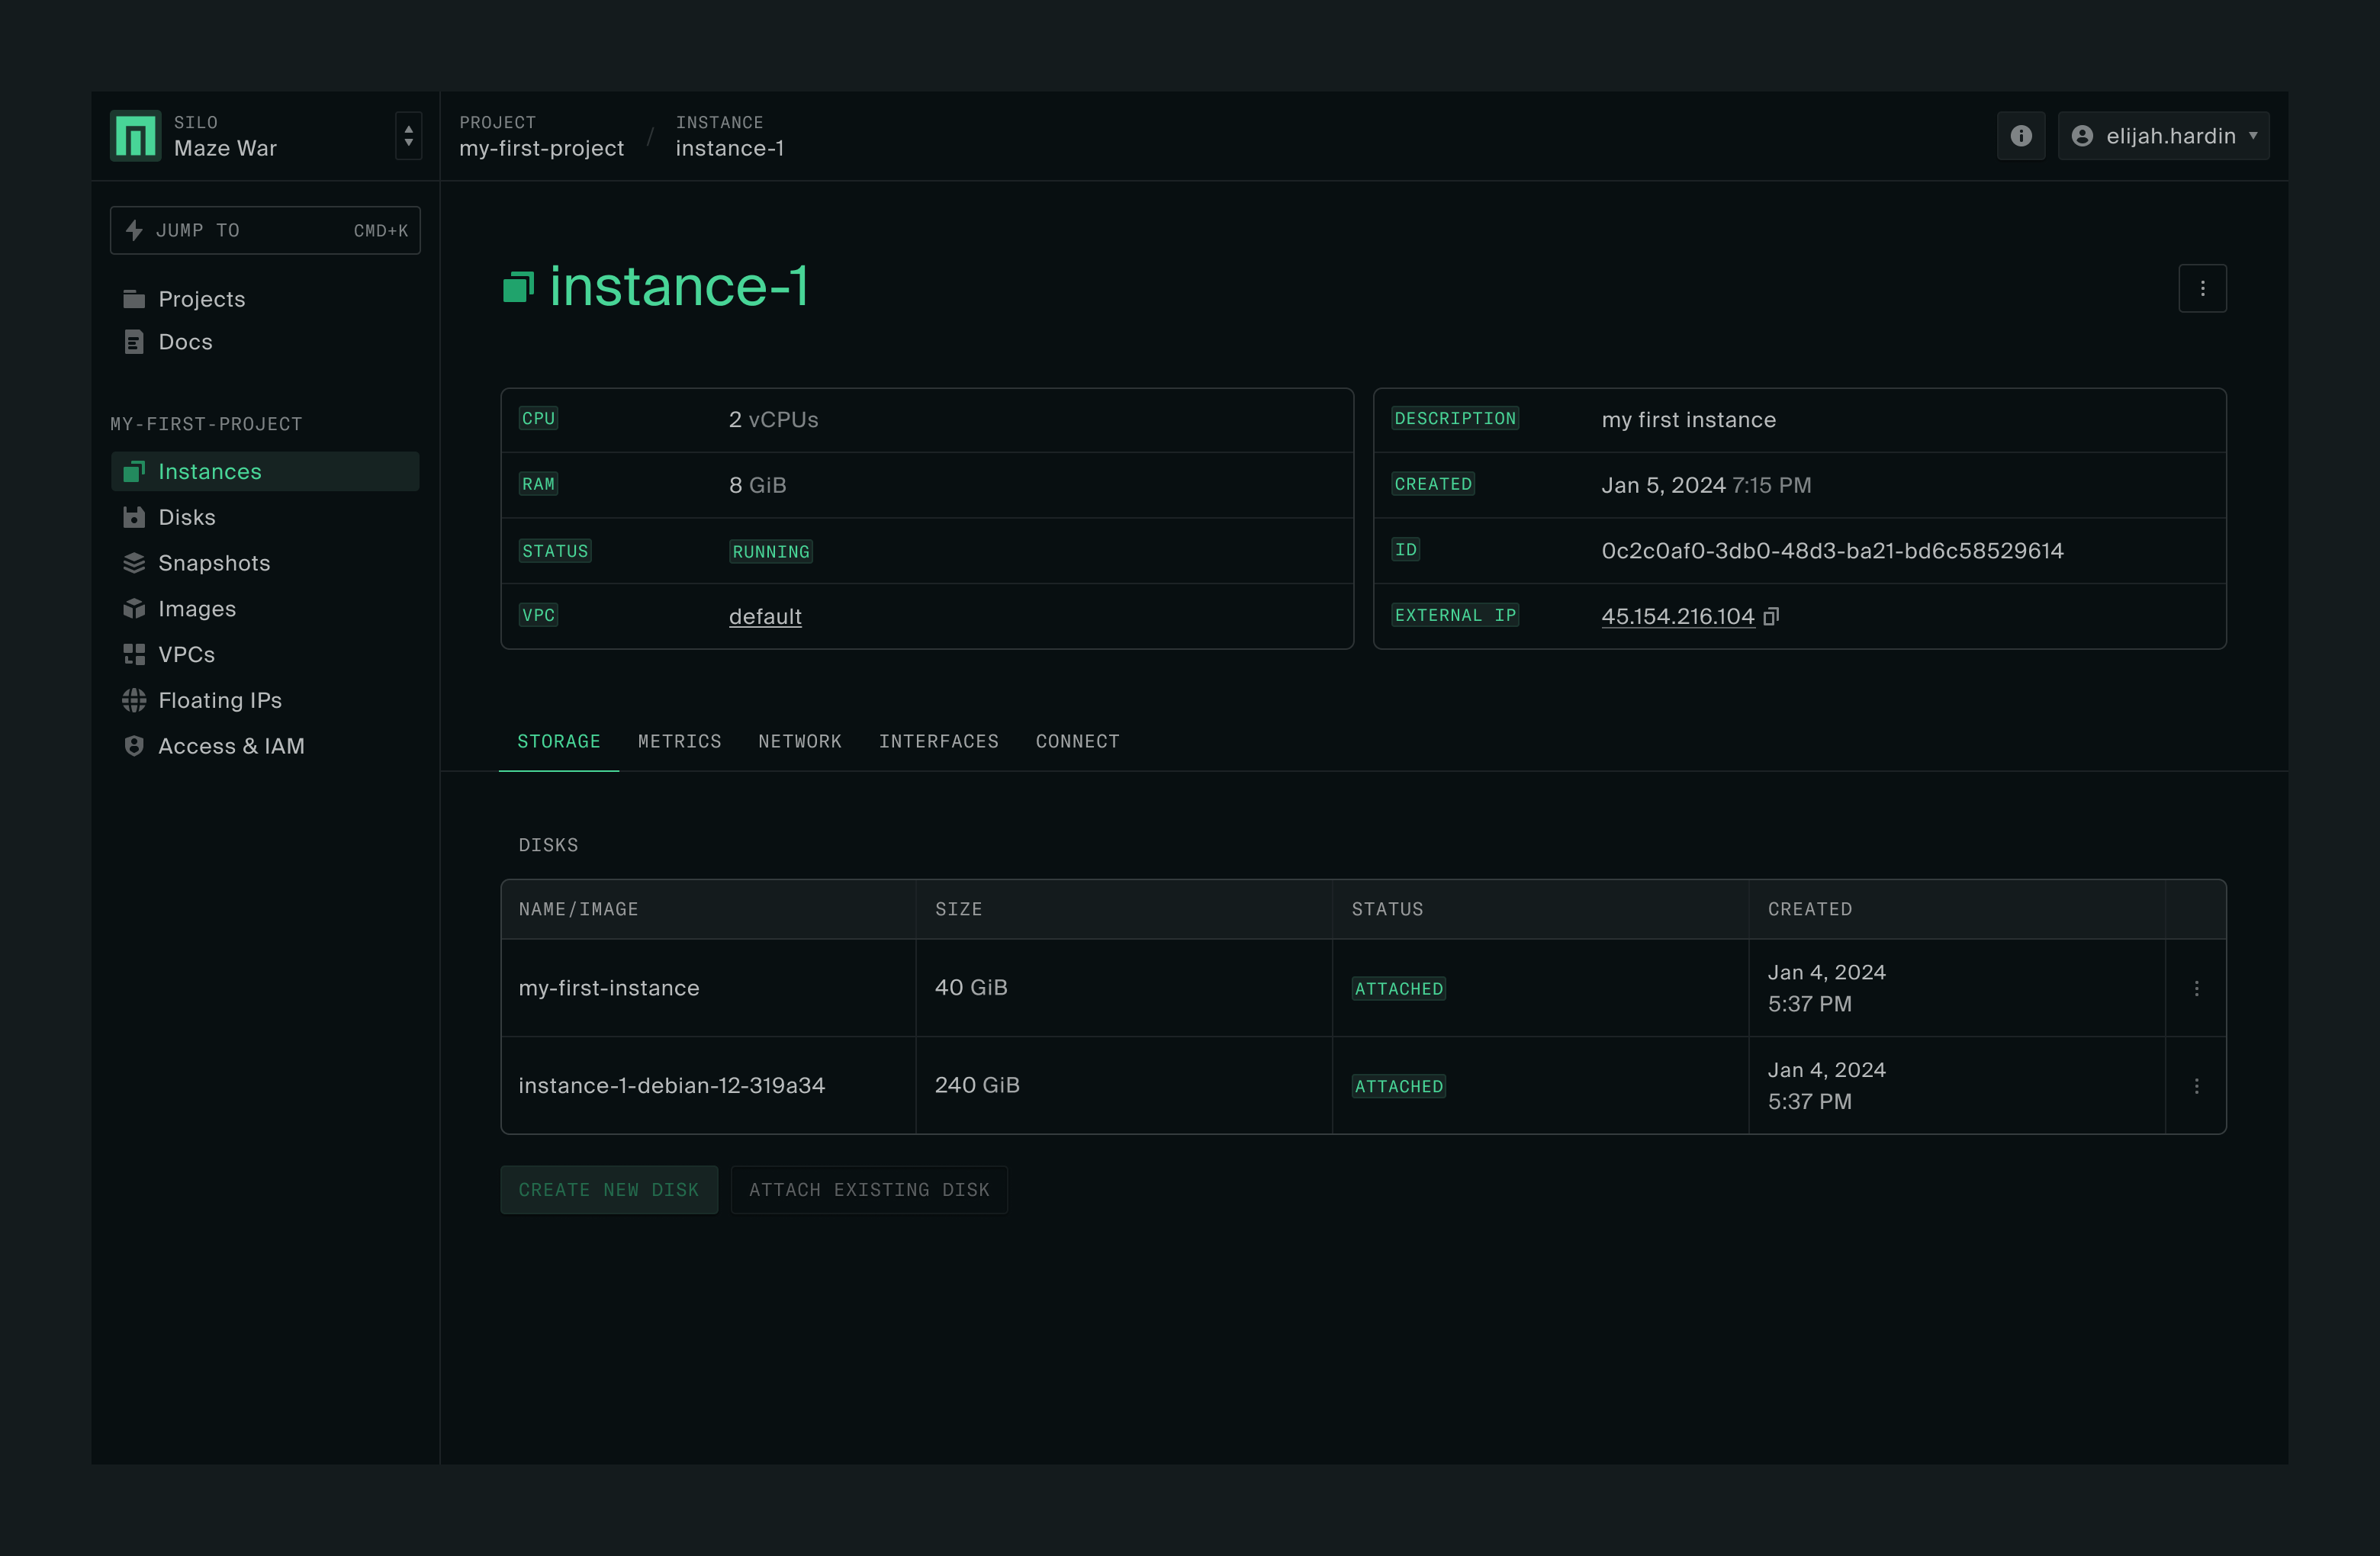
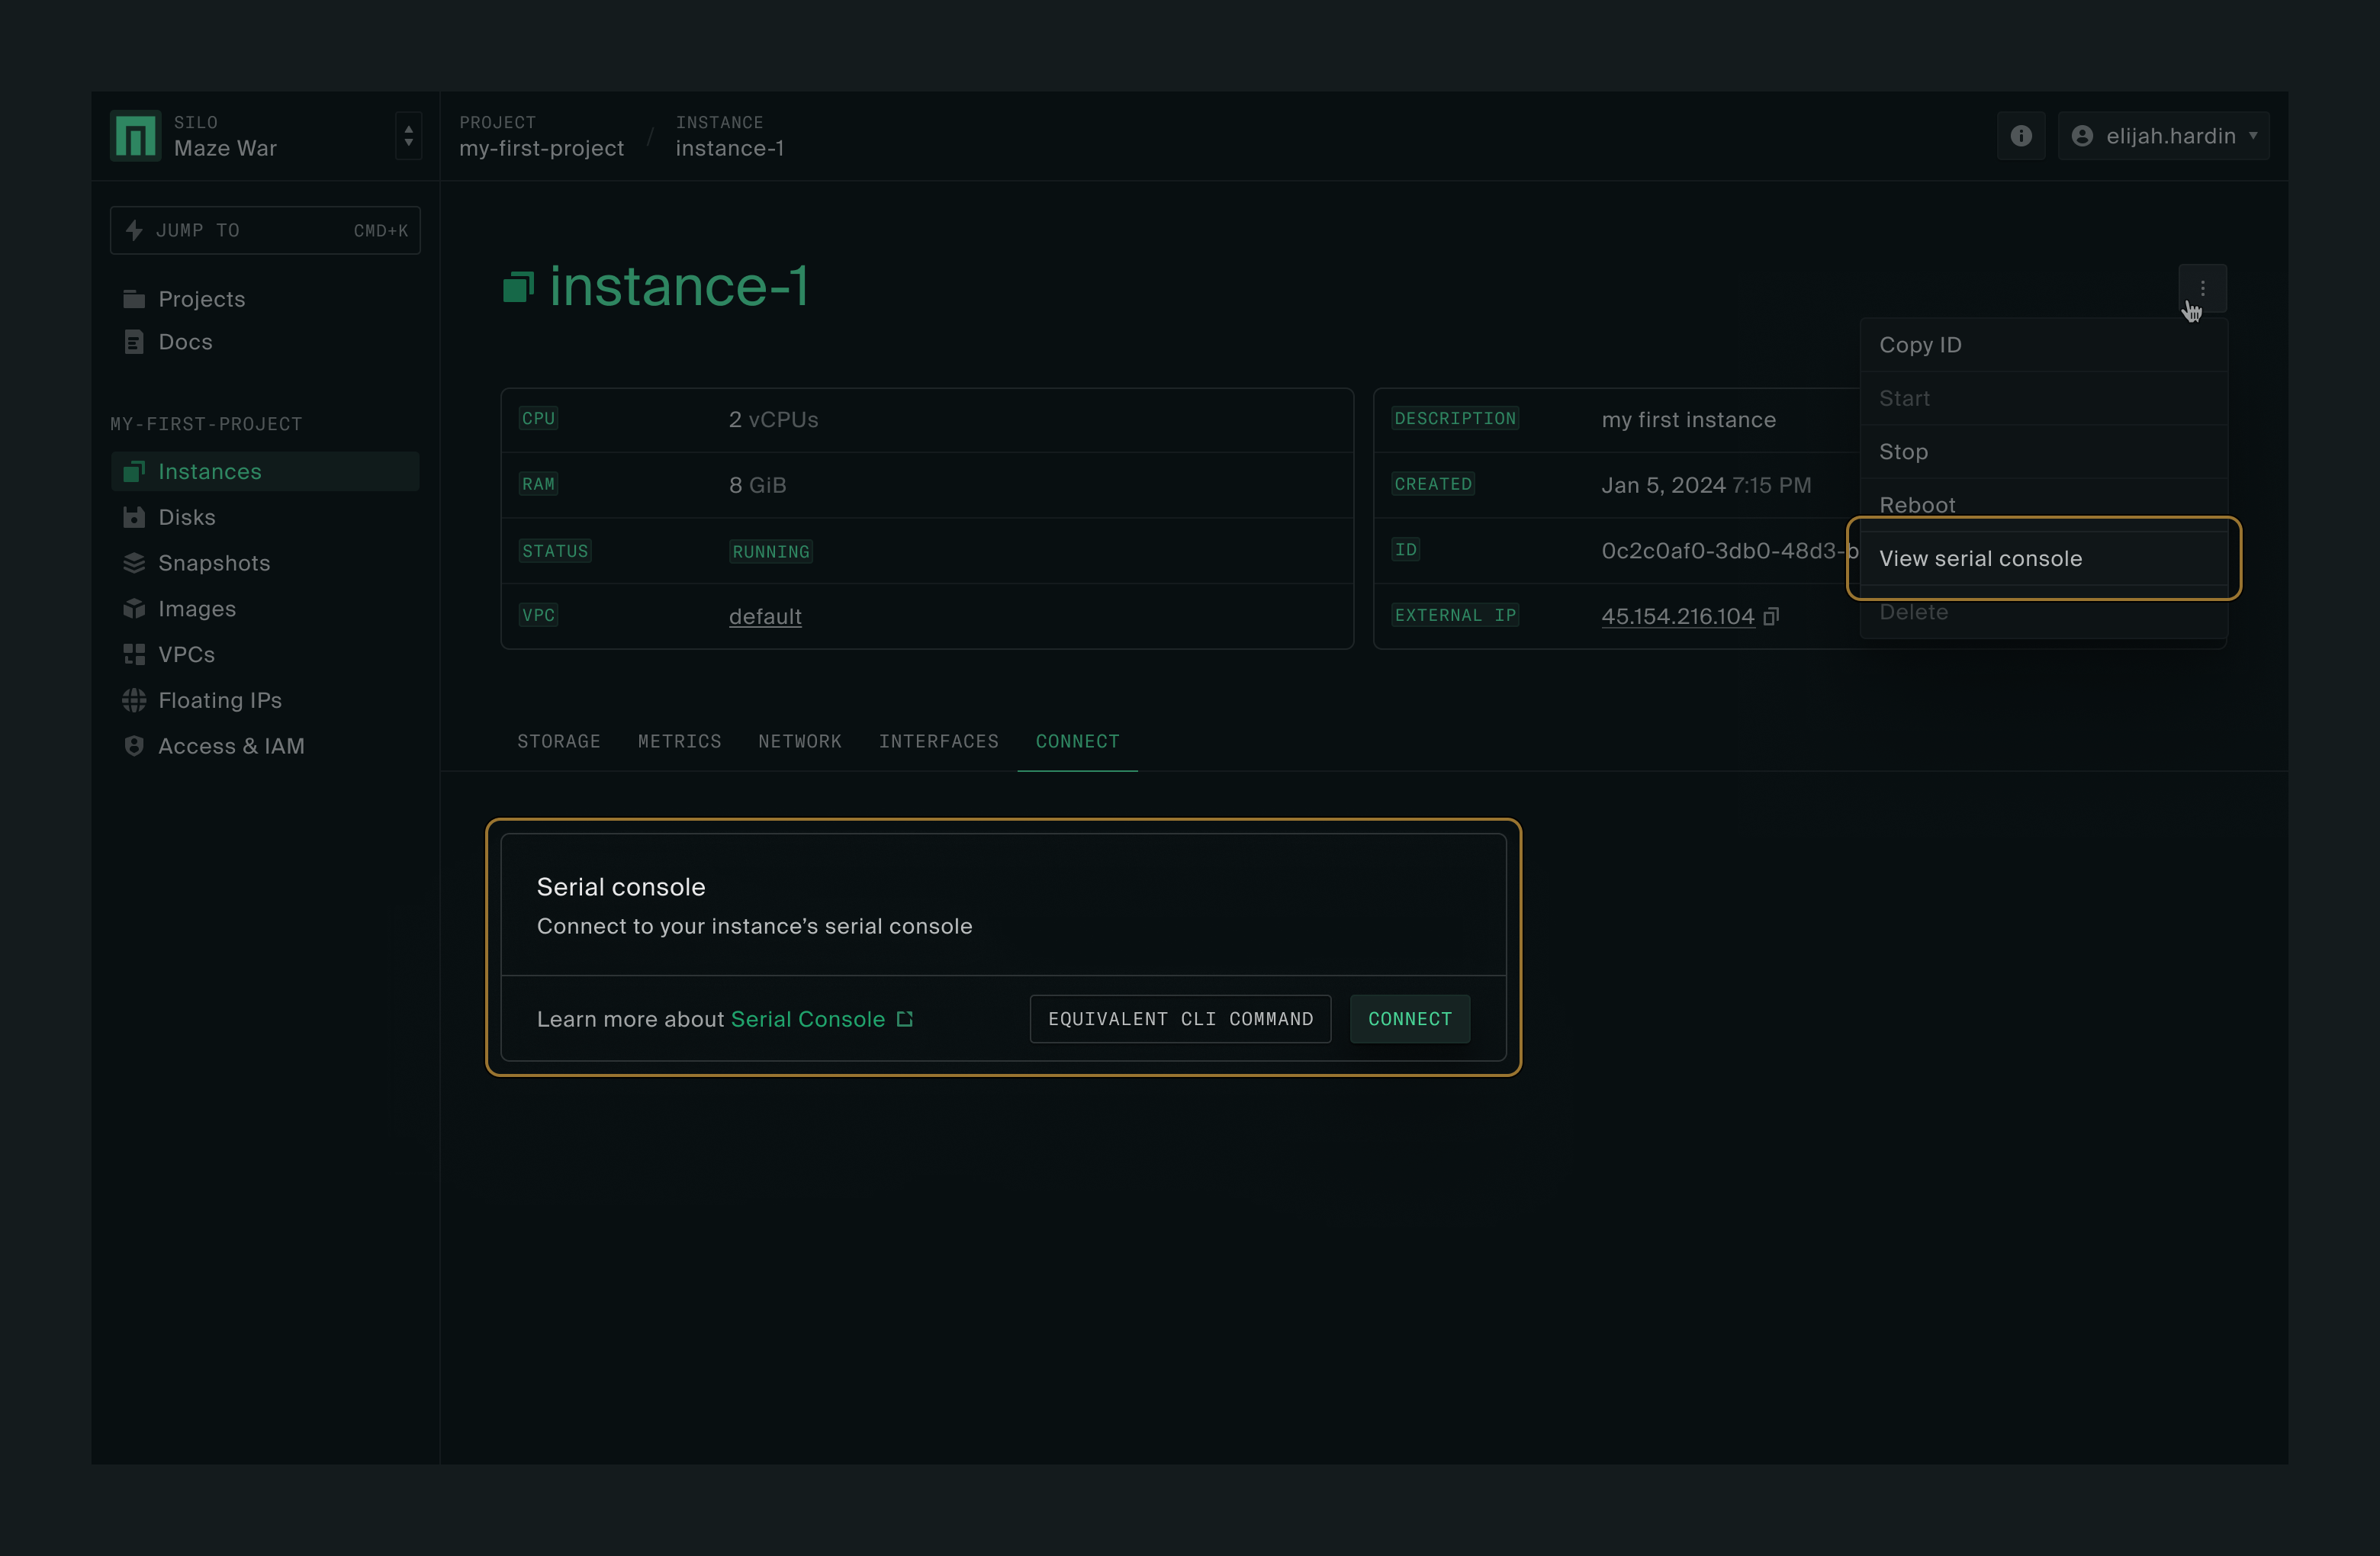
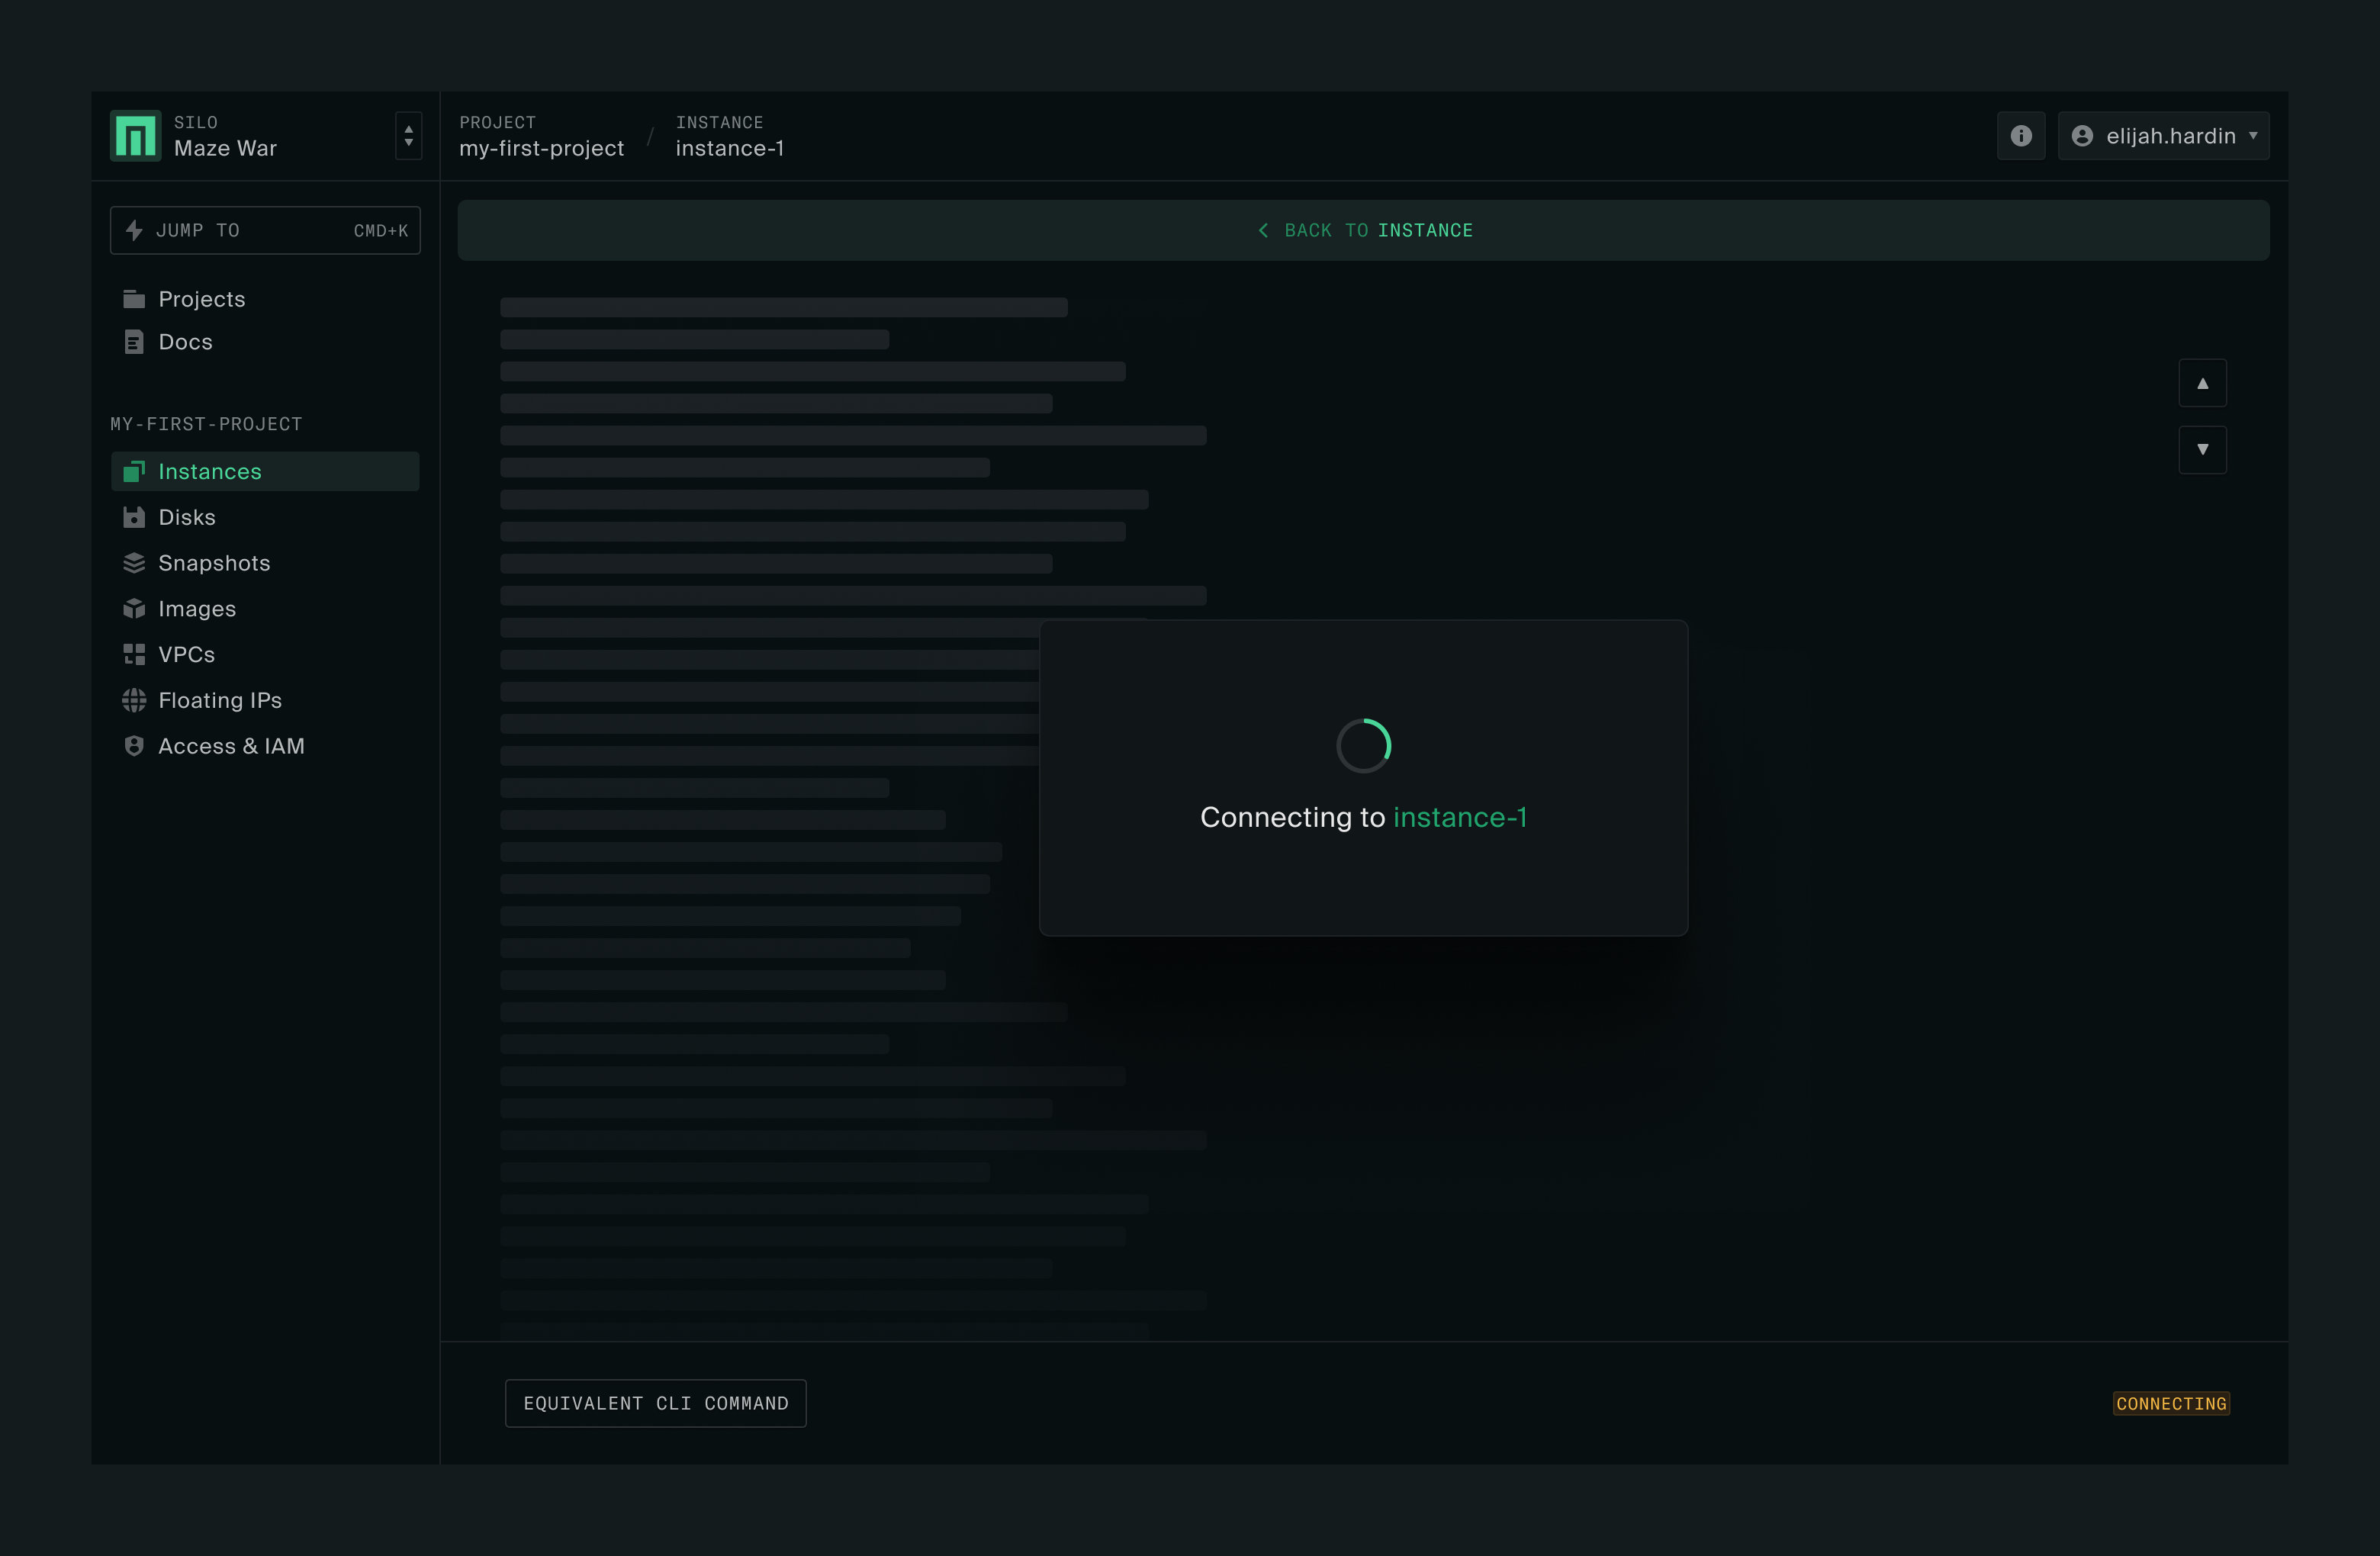
Serial console
Clicking on Connect will let you access the instance’s serial console directly from the web UI. You’ll be doing this via SSH next.
External IP address
In order to SSH into the instance next, you’ll need its external IP address, which is available at the top of the instance page. Copy the External IP value.
Access through SSH
First you’ll need a command line interface that interacts with the instance. How you do this will depend on your operating system.
If you have a Windows 10 or 11 workstation:
Click on the Start button on your Windows screen.
Search for Command Prompt, and click on it. That will open the default Terminal window.
On macOS, open a Terminal window by going to Applications > Utilities > Terminal.
At the Command Prompt enter (without any curly brackets):
ssh -i {private key location} debian@{external IP}If your SSH key has the default name and location (i.e., $HOME/.ssh/id_rsa), you can exclude the -i argument. You might get an SSH known hosts warning; go ahead and connect to the server.
You’ll then see a prompt, from which you can do any of the normal things you’d do when SSH-ing into a server.
External connectivity
All instances are set up with outbound external connectivity by default. You can start using your new VM to install or update the OS packages after logging in.
Feel free to do whatever you like with your new VM. If you are new to Debian, you can follow Install a test Debian package to try running a simple utility program.
If you are running an application that takes inbound traffic, you’ll want to modify the default firewall settings such that the application is accessible from external hosts. The firewall change involves just a few additional steps, as illustrated in the web server example in the appendix.
Deleting the instance
In order to delete an instance, you first have to stop it.
Stopping the instance
On the Instances page, click the three dots (more actions button) on the right side of your instance’s row. You’ll notice that the Delete option is not available yet. Click Stop.
The instance status will change to Stopping. Click the refresh button to get the current status.
Deleting the instance
Once the instance is stopped, click the three dots (more actions button) to the right of the instance again. The option to delete is now available. Click Delete.

A box will appear asking for confirmation. Click Confirm to delete the instance.
The disks attached to the deleted instance are put into the detached state. They can be attached to another instance or re-used to create a new instance. If the disks are no longer needed, you may also delete them.
The external IP addresses allocated to the deleted instance are now freed up and can be assigned to other new instances.
Appendix
How to make test images
Linux OS
For testing purposes, you can download one of the published generic cloud image from Debian, for example,
Windows OS
The creation of Windows images is a bit more involved but we provide a tool and a set of comprehensive instructions to make it easier. Please see the Windows Instances guide.
How to import an image file
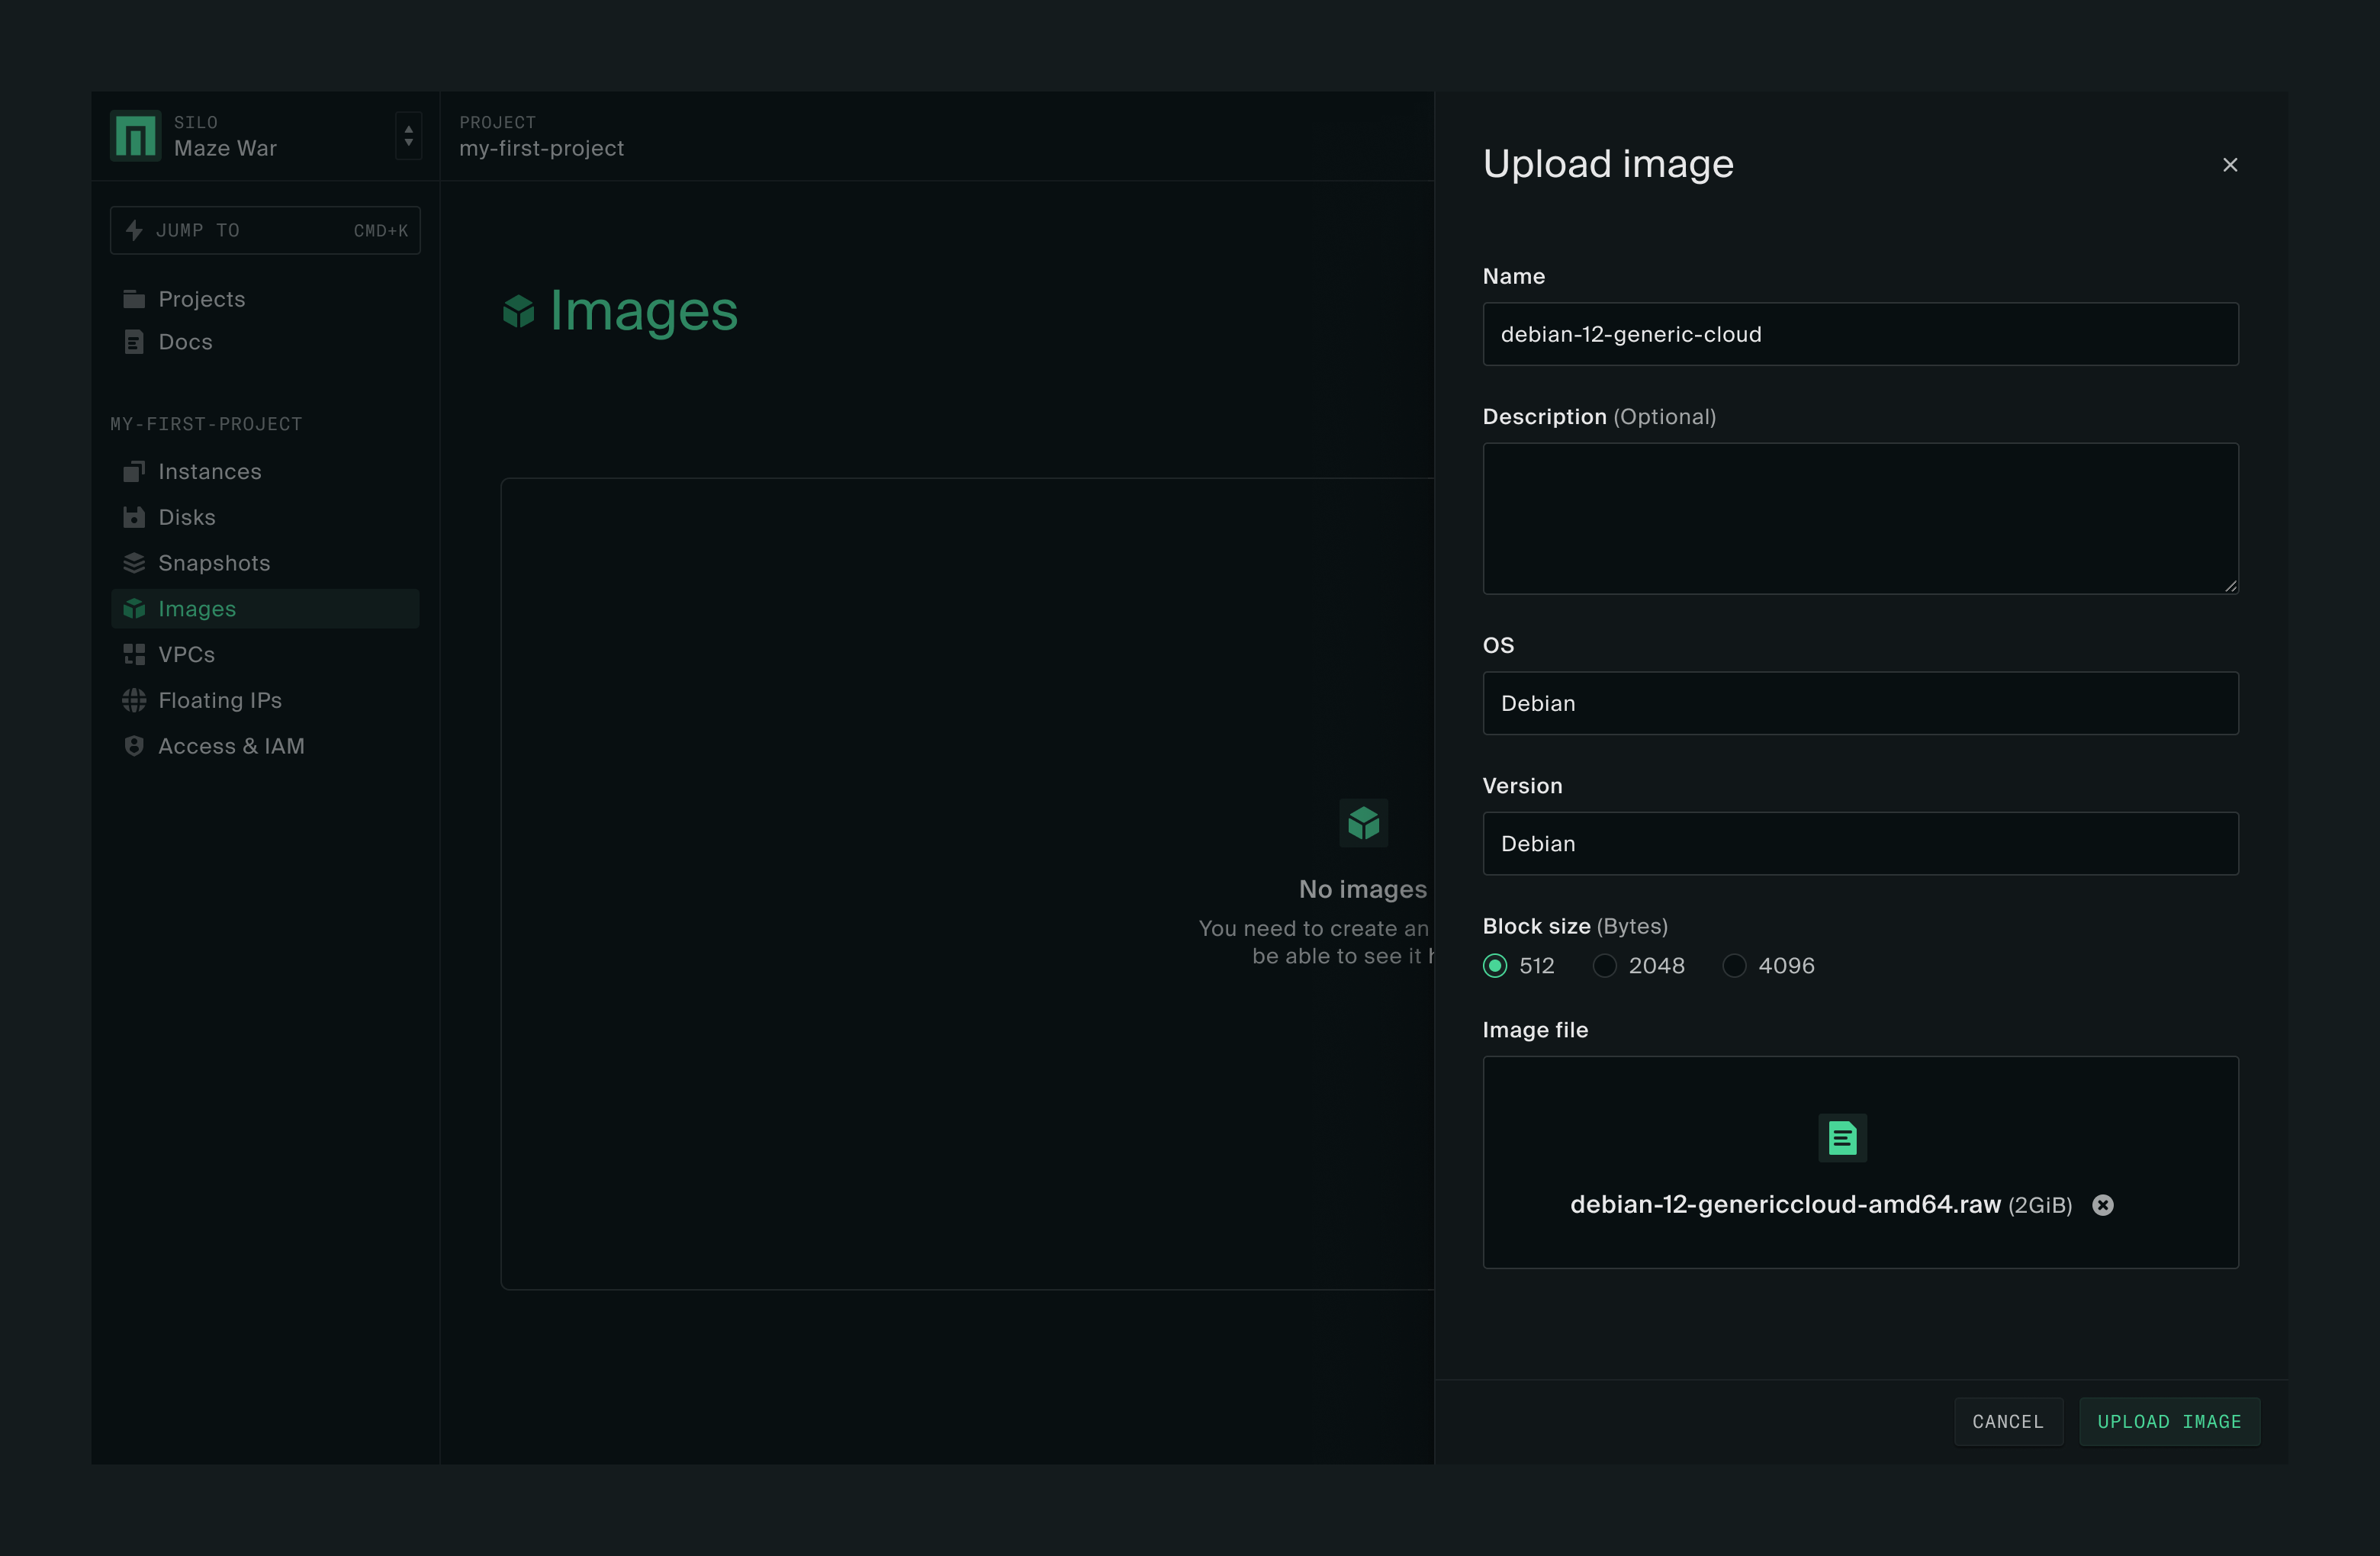
In the web console, navigate to your project. Click on Images on the left sidebar.
Now click on Upload image on the right side of the page.
This will open the Upload image box. Give your image a name and fill in the rest of the required information. For this example, we’ll use the Debian image mentioned above. Once you have downloaded the image to your workstation, click on Upload image in the lower right of the box.
When the image has uploaded successfully click Done in the lower right of the box.
You should now see the newly uploaded image listed on the Images page. The image will be available for creating the boot disk of a new instance.
More information about how to manage images can be found in the Images guide.
How to install a test Debian package
Assuming that you have executed sudo apt update earlier, you can now type and execute this command
sudo apt install ncalin the SSH session, which will install the ncal package.
Once you’ve done that, if you enter cal or cal 2024 command, you should see a calendar presented in the terminal.
Installing for x86_64-efi platform.
Installation finished. No error reported.
No DKMS packages installed: not changing Secure Boot validation state.
Processing triggers for initramfs-tools (0.140)
update-initramfs: Generating /boot/initrd.img-5.10.0-27-cloud-amd64
Processing triggers for libc-bin (2.31-13+deb117) ...
Processing triggers for man-db (2.9.4-2) ...
Processing triggers for grub-cloud-amd64 (0.0.5) ...
Installing for i386-pc platform.
Installation finished. No error reported.
Installing for x86_64-efi platform.
Installation finished. No error reported.

debian@myfirstinstance:~$ sudo apt install ncal
Reading package lists... Done
Building dependency tree... Done
Reading state information... Done
The following NEW packages will be installed:
  ncal
0 upgraded, 1 newly installed, o to remove and 0 not upgraded.
Need to get 30.1 kB of archives.
After this operation, 69.6 kB of additional disk space will be used.
Get:1 http://deb.debian.org/debian bullseye/main amd64 ncal amd64 12.1.7+nmu3 |30.1 kB]
Fetched 30.1 kB in 0s (1748 kB/s)
Selecting previously unselected package ncal.
(Reading database ... 22362 files and directories currently installed.)
Preparing to unpack .../ncal_12.1.7+nmu3_amd64.deb ...
Unpacking ncal (12.1.7+nmu3) ...
Setting up ncal (12.1.7+nmu3) ...
Processing triggers for man-db (2.9.4-2) ...

debian@myfirstinstance:~$ cal
January 2024
Su Mo Tu We Th Fr Sa
    1  2  3  4  5  6
 7  8  9 10 11 12 13
14 15 16 17 18 19 20
21 22 23 24 25 26 27
28 29 30 31

debian@myfirstinstance:~$
Make a web server
We’ll start by creating a basic HTTP server with a simple "Hello World" homepage. You’ll do so by executing the following commands in a Linux VM:
mkdir public
cd public
echo Hello World > index.html
nohup sudo python3 -m http.server 80 &
At this point, your server should be up and running. You can verify that with curl:
$ curl http://localhost
Hello World
If you try the same command from your workstation against the external IP of your VM, i.e.,
$ curl http://{external IP of your VM}you’ll notice that the command hangs and eventually times out. This is because the default firewall settings in the VM’s VPC allow inbound external connections only on certain ports.
To customize the firewall rules, navigate back to the instance details page for your VM, then click on the VPC name (it should be default if you have kept the advanced settings unchanged during instance creation).
There, you’ll see the Firewall Rules tab and a list of existing rules. Let’s take a look at the allow-ssh rule by clicking on the rule name.
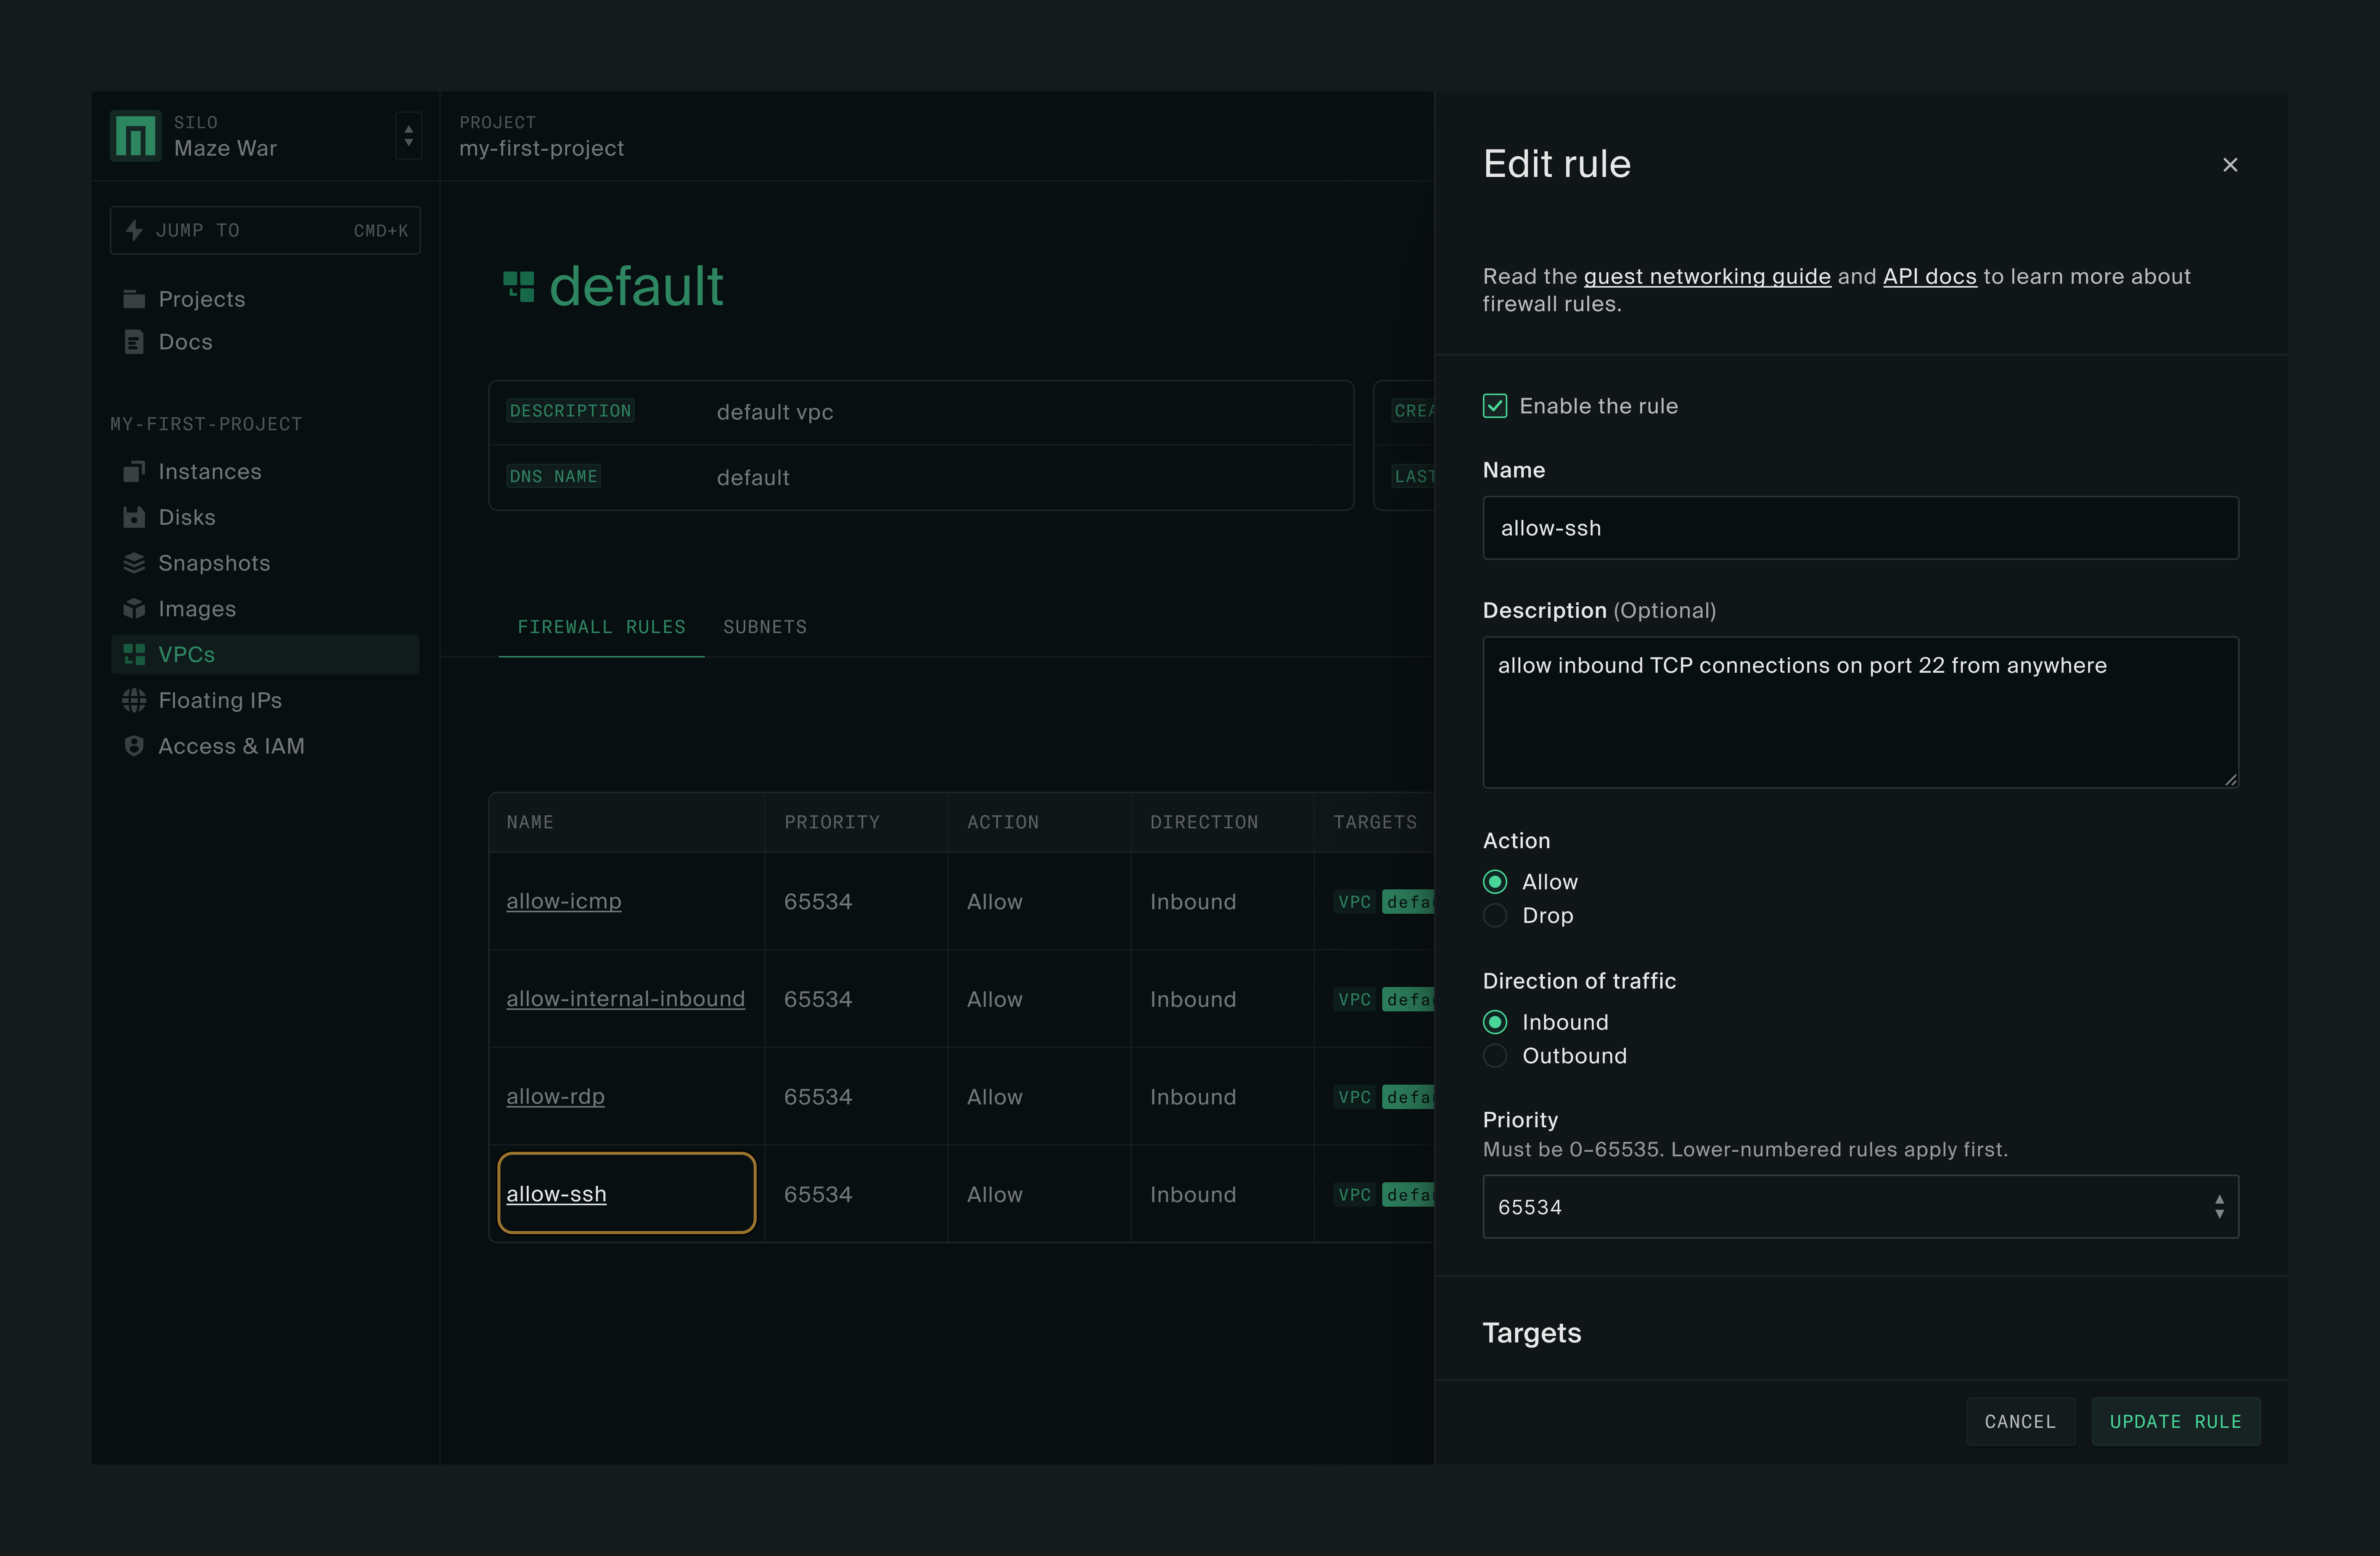
The rule is configured to allow inbound TCP connections on port 22 from any host. To allow your HTTP server to be accessible from anywhere, you can add a new rule that mimics the allow-ssh rule, except that it’ll have port 80 as the filter criteria.
First, click on New Rule and enter the following information:
Name: allow-http
Description: allow inbound TCP connections on port 80 from anywhere
Target:
Target Type: VPC
VPC Name: default (click Add Target after this)
Port Filter: 80 (click Add Port Filter after this)
Protocols: TCP
You can leave other fields with the default values and click Add Rule at the bottom of the form.
Now you can retry the curl command from your workstation and it should return "Hello World".
If you are running a different application that uses other port numbers, you can just replace 80 with the relevant port number or range in the rule. If you want to open multiple discrete ports, you can add them one at a time with Add Port Filter in a single rule. More information about firewall rules is available in the Guest Networking guide.