Primary VNIC
Overview
Virtual machine instances (instances or VMs for short), virtual private cloud (VPC, private networks), images, and disks are organized in projects. These project resources are accessible only by users who have the appropriate project and/or silo roles.
The permissions to create, update, or delete project resources are limited to users with the "collaborator" or "admin" role in the project. A project admin can also modify the project’s name, description, and access policies, and can delete the project.
VM instances can be provisioned with machine images made available by the project or silo administrators and collaborators. A VM may have one or more private network interfaces and, optionally, external IP addresses. You can use the default VPC and subnet that come with every project or other custom VPCs and subnets you or others set up in the project.
Creating virtual machines
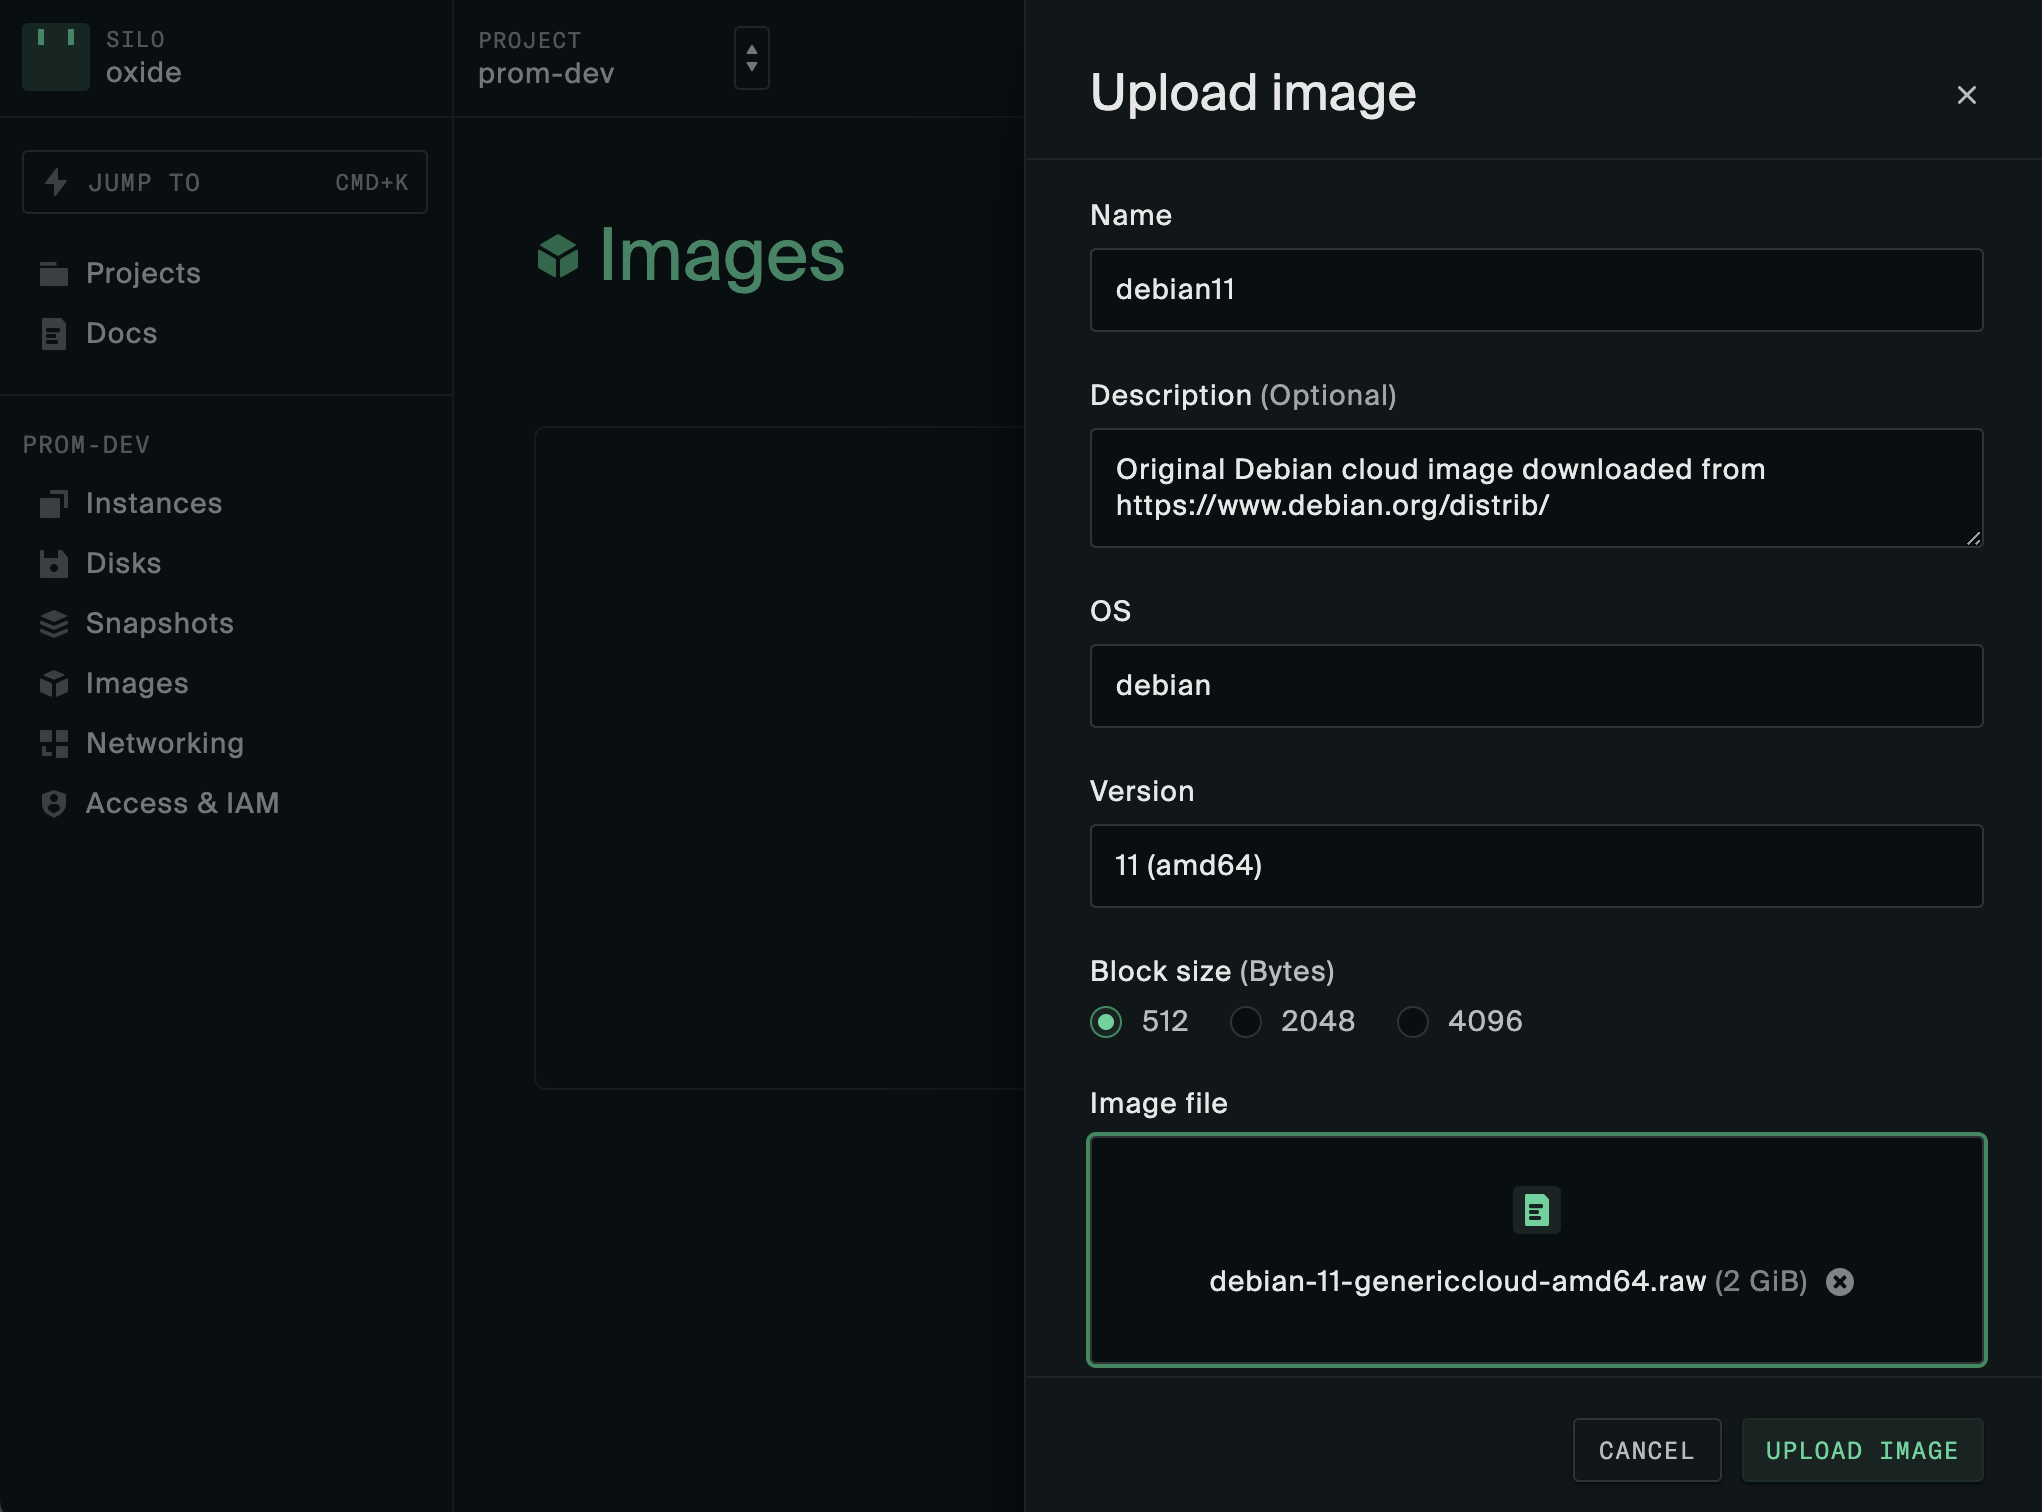
The first step of VM provisioning is choosing a boot image with the desired operating system. You may need to upload an image through the web or CLI. Then you can either specify that image at instance create time or create a disk ahead of time and attach it during instance create. See the web or CLI quick start guides for more detailed instructions.
When creating a VM instance, the following attributes must be specified:
Project name
Instance name
Boot disk name
Number of virtual CPUs (up to 128 in currently available rack models)
Memory size (in bytes; minimum 1 GiB, maximum 1.5 TiB depending on sled type*)
* On 2-TiB DRAM sleds, the largest instance is 128 vCPUs and 1.5 TiB memory. For 1-TiB DRAM sleds, max memory size is 853 GiB.
Optional parameters include:
New or existing disks to attach (up to 12, including the boot disk; maximum disk size 1023 GiB)
Network interfaces (options: default, specific VPC subnets, or none)
External IP addresses (options: ephemeral IP or floating IPs)
Overriding hostname
User data for
cloud-init(e.g., data and scripts for bootstrapping, maximum 32 KiB)Start on create: whether to start the VM once it’s been created (default:
true)Anti-affinity groups: groups to add the instance to (maximum 16 per instance, up to 32 instances per group)
Auto-restart policy: whether to have the instance auto-restarted on failure (options: never, best effort)
The following attributes are configured to system default values when they are not included in the provisioning request:
Network interfaces:
default, i.e., private IP address assigned from the VPC and subnet both nameddefaultvia DHCPExternal IP:
none, i.e., no inbound external IP address assignedHostname: set to the VM name
In addition to the cloud-init user data, other VM metadata such as hostname and SSH public keys are written to a CIDATA volume with base64 encoding. The VFAT volume is mounted during boot time to pass the metadata to cloud-init and is unmounted afterwards.
Using your VM instance
Instance state and inbound connectivity
When an instance is started (which happens by default at create time unless start: false is specified), its state will transition to starting and then running. A running instance is ready for access if the guest and networking setup meets all the prerequisites for remote access. You can also connect to the instance through its serial console.
Outbound connectivity
Instances with network interfaces on a VPC subnet have outbound connectivity by default via source NAT, which is provided by the internet gateway in the VPC.
Interfaces and devices
Inside an instance, you will find the Virtual NICs (VNICs) and volumes for each of the VPC subnet interfaces and virtual disks attached to it.
Virtual NICs
Network configurations are passed to instances via DHCP requests from the guest operating system. The way network interfaces are configured by cloud-init is specific to the operating system and version. For example, RHEL variants issue DHCP requests for each of the attached devices whereas Debian variants issue a DHCP request on the first interface only.
Inside the instance, VNICs show up to the guest operating system as a normal PCI Express network interface card and can be viewed in normal networking tools like ifconfig, ip link, ipadm, and the PowerShell Get-NetIPAddress. While a VNIC behaves the same as a normal device, there are a few exceptions:
The interface will always appear up.
The speed of the interface is not a reflection of the actual speed of the link (there is none, because the NIC is virtual).
Certain commands and tools that ask for features of Ethernet (such as link advertisements, auto-negotiation configuration, or blinking a NIC’s LEDs) will not function the same way and will likely fail.
Each network interface can be configured as IPv4-only, IPv6-only, or dual-stack when the instance is created. See the Networking guide for details.
Each interface receives IP addresses from the VPC subnet matching its configured IP stack.
There are other guest and interface options set over DHCP:
The MTU of a network interface, 1500 by default. The primary interface uses an 8500 byte MTU when jumbo frames are enabled.
DNS servers, currently set to the upstream DNS servers configured during rack setup.
The default gateway for all traffic, which is based on the VPC Subnet.
The first network interface is considered the primary interface. The primary interface has several properties:
Ephemeral and floating IPs are always forwarded to it.
It is the only interface to receive a default route over DHCP.
Additional interfaces from different subnets can also be allocated. These secondary interfaces will not be registered in DNS, though all firewall rules targeting them will be applied. Whether secondary interfaces can be configured via cloud-init user data depends on the guest operating system. Refer to cloud-init documentation and user guides from the distro providers.
Volumes
Volumes are presented to the guest operating system as block devices, one for each of the disks attached to an instance. They are created with thick-provisioning, i.e., the amount of storage reserved equals the disk size requested. The disk specified as the boot disk will be tried first for booting; if no boot partition is found, any other disks attached to the instance will be tried next. If none of the disks is found to be bootable, the system will fall back to the UEFI shell.
In Linux instances, volumes are attached as NVMe interfaces:
ubuntu@worker1:~$ lsblk
NAME         MAJ:MIN RM  SIZE RO TYPE MOUNTPOINTS
vda          252:0    0   21K  1 disk
nvme0n1      259:0    0  100G  0 disk
├─nvme0n1p1  259:2    0 99.9G  0 part /
├─nvme0n1p14 259:3    0    4M  0 part
└─nvme0n1p15 259:4    0  106M  0 part /boot/efi
nvme1n1      259:1    0  100G  0 disk /logs
In Windows instances, volumes are named disk0, disk1, and so on. Volumes can be managed with the command-line tool diskpart or the Computer Management GUI:
oxide@worker1 C:\Users\oxide>diskpart

Microsoft DiskPart version 10.0.20348.1

Copyright (C) Microsoft Corporation.
On computer: WIN2022-TEST

DISKPART> list disk

  Disk ###  Status         Size     Free     Dyn  Gpt
  --------  -------------  -------  -------  ---  ---
  Disk 0    Online           20 GB      0 B        *
  Disk 1    Online          100 GB      0 B        *
  Disk 2    Offline          21 KB    21 KB
There is an additional volume for passing instance configuration: on Linux, the unmounted vda read-only volume; on Windows, the disk in offline status.
Device numbering is not deterministic and may not match the order in which disks are specified during instance creation. To predictably reference a particular volume at boot time and across reboots, you can use the persistent identifiers provided by the guest operating system (e.g., the symbolic links in / on Linux). The device naming convention may change in future releases; such changes will be highlighted in the release notes.
Performance counters
CPU performance counters are available to guest operating systems. Some of the most commonly used performance events can be counted, such as CPU cycles, instructions retired, branch instructions, and branch misses. Supported performance counters and events are consistent with a VM’s reported CPU architecture; tools such as Linux’s perf work without modification.
Beware that measuring more events than the number of available performance counters may impact the performance of the virtual machine. Additionally, guest operating systems have access to fewer performance counters than a processor architecture may incorporate. Available counters can select only a subset of all performance events a processor can report. Counters selecting unsupported performance events read as zero.
Instance configuration changes
Changes that can be made after creation include vCPU and memory sizes, disks attached, boot disk designation, anti-affinity groups, auto-restart policy, network interfaces, and external IP addresses. See the Instance Actions guide to learn more.
Modifying disk sizes after creation is not supported yet.
Boot images
You can create boot disks from operating system images or machine snapshots created on the Oxide rack. External cloud images in RAW format can also be uploaded to the rack via disk or image import. The data source for import must be a file accessible from your workstation file system.
Each boot disk can only be attached to one VM at a time. To allow a boot disk to become a reusable image for other workloads, you can make disk snapshots and create images from them. The web console and CLI both provide a one-step process for turning an external file into a rack image, essentially combining these three actions:
import external file to disk
make disk snapshot
create image from snapshot
For more on images, disks, and snapshots, see the Images, Disks and Snapshots, and Windows Instances guides.
Boot order
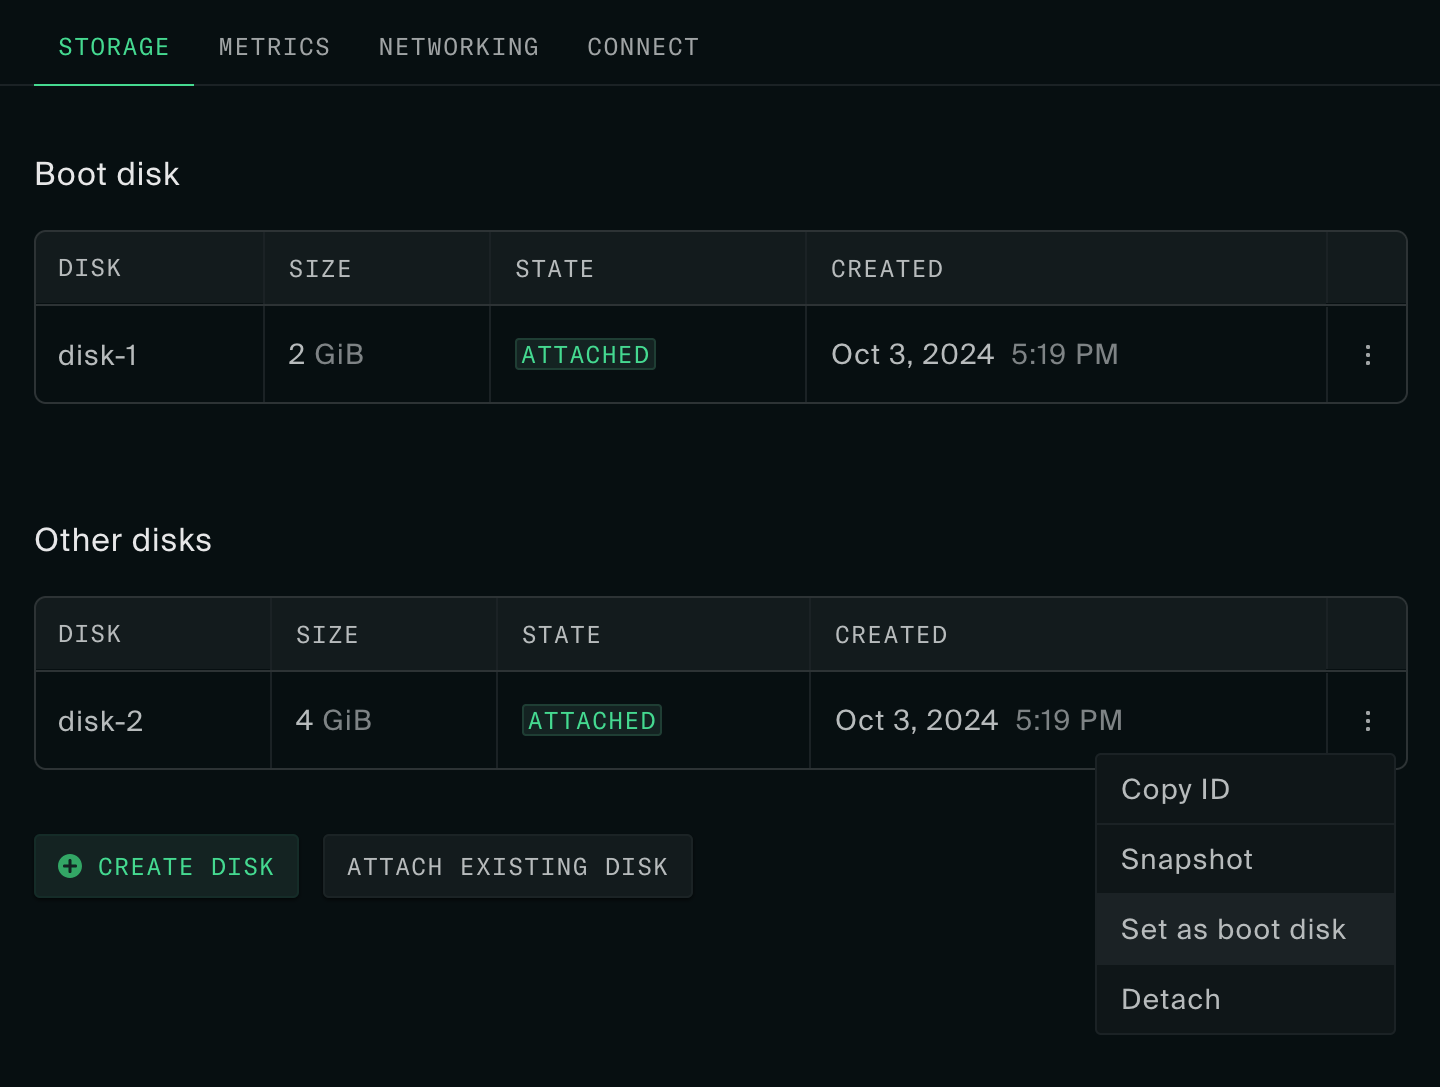
You can set the boot order for an instance through the boot_disk parameter on instance_create or instance_update. The boot disk is automatically set when creating an instance through the web console or the oxide instance from-image CLI command. However, oxide instance create is more flexible, requiring the user to specify the boot disk explicitly.
Setting a boot disk is optional, but setting one is recommended unless you intend to manage boot order yourself within the VM. When an instance with multiple disks does not have a set boot disk, the firmware may attempt all of them in PCI device order until one of them boots. Even with only one disk, setting a boot disk is recommended in case more disks are attached later.
Affinity and anti-affinity
An anti-affinity group is a collection of instances that are intended to be deployed on different sleds. This is useful for replicated services: running replicas on different server sleds prevents the failure of one sled from impacting multiple instances of the service. The sled is the "failure domain" for the group; for now, sled is the only allowed failure domain.
The policy field on the group determines what happens when an instance cannot be started in a way that satisfies the anti-affinity rule, i.e., when all available sleds already contain a running instance from the group. This policy can be set to
fail— prevent instance from starting if no unique sled is available.allow— allow instance to start even if no unique sled is available. The instance is placed on an arbitrary available sled.
The maximum number of members in an anti-affinity group is 32. A given instance can be included in up to 16 groups.
If an instance cannot start because of a constraint violation, the API will respond to the start request with an "Insufficient capacity" error.
Note
Only anti-affinity groups are currently represented in the API. We are evaluating the use cases for affinity groups, which would keep instances together rather than apart.